SEASON 5 LIVE 🔴
10-29 Points: 5% Discount
30-49 Points: 10% Discount
50-59 Points: 20% Discount
60-69 Points: Vaulted Promo and 20% Discount
70 Points: Mystery Prize and Vaulted Promo and 30% Discount
Collapsible content

Week One: The Hotel’s InvitationInspired by Logan the Backrooms Nerd’s Hotel Submission
Welcome to Challenge Season 5! In this first week, we explore a scenario inspired by Logan the Backrooms Nerd’s Level Design idea: The Hotel’s Invitation.
You thought you won a dream vacation—luxury, comfort, relaxation. But once you enter, something feels wrong. The hotel’s timeless elegance, paintings of endless corridors, and empty reception desk with silver keys seem off. Then, the paintings shift, the lights flicker, and you realize you're not alone. The hotel is trapping you, and you must make the right choices to escape.
Two Paths in the Hotel:
Path One: Follow the Paintings
The paintings aren’t just art—they’re traps. Figures appear, hallways loop endlessly, and soon the figures start bursting from their canvases.
Battle in the Shifting Halls (Lv3):
Defeat three entities of different light levels (yellow, green, and red) in the hotel. Each victory brings you closer to the truth but at the cost of your sanity. After each defeat, flip the Position Token: if it lands Gem-side up, you’ll see yourself inside the painting and lose 5 Sanity or discard an item from your Inventory.
Fluid Walls (Lv1):
The hotel shifts as you move. Swap the cards on the left and right of your Position Token every time you move, even moving Permanent Fixture/portal cards.
Windowed Reality (Lv2):
One painting isn’t just a painting—it’s a Window entity. Once you have 3 different colored entities, reveal cards from the Pull Pile until you find an entity with at least 5 Health. Engage it, discard any current engaged entity, and flip the Position Token when attacking with an item. If it lands Gem-side up, the item flips facedown and deals only 1 damage instead of its normal effect.
The Final Portrait (Lv3):
The last painting isn’t shifting—it’s a reflection of you. After your deck runs out, when the Void appears, shuffle all entities in your Inventory and place them face down in the engagement zone. Reveal the top entity and defeat all three consecutively. Once defeated, the wall behind the portrait crumbles, revealing a tunnel and two monitors. A message appears:
"Now I see you. You’ve been marked. Stand by."
Path Two: Pursue the Scream of the Lost Guest
You thought you were alone, but unfinished meals, warm coats, and a voice calling for help tell a different story. Someone else was here—or still is.
Setup:
Choose a companion card as the Lost Guest. Shuffle 1 Lecture Hall, 2 Dead Ends, and 2 random red light entities to form the Search Stack, placed in the NLD zone. These cards don’t count toward your deck-building light limits.
Echoes of a Guest (Lv2):
The Lost Guest left notes, hinting that they lost their room key. Each time you enter a Destroyed Hall, reveal the top card of the Search Stack:
If it’s a Dead End, take 2 DIH damage and place it on a valid FOP space.
If it’s an entity, engage or discard it and take the Sanity loss.
If it’s the Lecture Hall, you’ve found the key. Shuffle it into your deck, then locate and enter the Lecture Hall.
Inside the Room (Lv3):
The Guest’s notes hint at a way out, but reality is shifting. You must collect two special items before you’re trapped forever. Each time you enter the Lecture Hall, flip the Position Token:
If Gem-side up, you find a special item. Draw an item from the Pull Pile and add it to your Inventory.
If Compass-side up, you may spend 5 Sanity to flip again in search of an item.
You need to find 2 Special Items.
Vanishing Hallways (Lv2):
Hallways now cost you 3 Sanity each time you move. Each Hallway you move off of is discarded. You need 4 Hallways in the Discard Pile to complete this challenge.
The Guest’s Last Words (Lv2):
The final note reads: "It sees you now." To complete this challenge, have 3 Dark Halls on the FOP at the start of your Movement round. Then, enter 2 of them back to back.
The darkness leads you to the same two monitors. A flash of light, and the message appears:
"Now I see you. You’ve been marked. Stand by."
The Hotel Was Never Just a Hotel.
It was a lure, a test, and now you’ve been seen. The golden glow fades, replaced by the harsh flicker of a CRT screen. The hotel is gone, but the monitors remain. Someone—or something—awaits you on the other side.
Collapsible content
Week Two: The Monitor’s Trap
Week Two: The Monitor’s Trap
Welcome back for Week Two of the Fifth Challenge Season, Wanderers! We’ve got another wild scenario for you to engage with, and hopefully, you’ve brought your wits with you as you contend against The Monitor’s Trap!
The hum of flickering lights pulses in time with your heartbeat as you step into the next room of the Lobby Levels. Against the far wall, a pair of old CRT monitors sit atop a desk, their screens static-filled, shifting between shapes, faces, and words that dissolve before you can comprehend them. Something about it is very wrong, but you feel your will to avert your eyes weakening as you approach them with weary steps.
The air around you distorts, whispers slithering into your thoughts like phantom fingers. You’re being watched—not just by the screens, but by something inside of them. Your body tenses. The Monitors are speaking to you.
> Watch.
> Listen.
> Submit.
The longer you hesitate, the stronger their pull becomes. You must decide, and quickly—because if you take too long, the trap will close around you, and you may never leave this room again.
---
Scenario 1: The Monitor’s Trap – No Matter What, It Follows
The whispers slither through your mind. The Monitor’s static hum pulses, watching, waiting. Your choices mean everything—but no matter what path you take, you wonder if something might not try to escape with you.
---
Path One: Fight the Signal
You tear your gaze away from the flickering screen, refusing to let the Monitors sink their hooks into your mind. The whispers grow louder, pressing against your skull like invisible hands. You dig your nails into your palms, bite the inside of your cheek—anything to stay grounded.
🏁
Note: You must escape through the Golden Stairs in order to consider the run completed.
SETUP
You must have at least 3 Monitors in your deck
Keep 2 of the Monitors off to the side. After dealing out the No-Clip round, place them out on the left and right spaces next to your position token. For this first No-Clip round, they may cover any card, even Unfriendly entities and Portal Cards.
Challenges
1. Mental Strain (Lv3):
While a Monitor is on the FOP, items cost 2 Sanity to pick up.
Monitors now deal 1 DIH damage per Monitor on the FOP/Engagement Zone each round while engaged, and can only be defeated by using 2 Attack items instead of 1 (Only 1 attack item may be used per Action round per the normal rules).
After defeating a Monitor, place it in your Inventory. Any defeated Monitors can occupy the same space in your Inventory.
2. Distorted Perception (Lv2):
If you reveal at least 1 Unfriendly entity when placing Navigation points, engage with it/one of them at the start of the Action round.
3. The Static Door (Lv1/3):
The Golden Stairs now costs 15 Sanity to enter, and requires you to have 2 Monitors in your Inventory. If you have 3 Monitors in your Inventory when you exit, you gain 3 Points for this challenge instead of 1.
When you step through, you don’t realize it, but something steps through with you.
The screen is off. The whispers are gone. But your shadow is no longer the same shape it was before.
You resisted. You fought back. But something was unleashed when you finally entered the Golden Stairs. Something… something got in.
---
Path Two: Let the Signal In
You stop fighting. The static draws you in, wrapping around your mind like an electric fog. The Monitor has so much to show you. It will require sacrifice, betrayal, and eventually falling to the brink of Insanity to find your way out of this horrifying trap, but there’s no way around it, you feel.
SETUP
You must have at least 2 Companions and 3 Monitors in your deck.
Keep 2 of the Monitors off to the side. After dealing out the No-Clip round, place them out on the left and right space next to your position token. For this first No-Clip round, they may cover any card, even Unfriendly entities and Portal Cards.
Note: You must escape through the Golden Stairs in order to consider the run completed.
Challenges
1. The Whispering Truth (Lv1-3):
Offer the Monitor’s relics by concealing them with pairs of items. Conceal 1, 2, or 3 Monitors for 1, 2 or 3 Points. Each Monitor you conceal requires using 2 of the same concealable item (2 Death Moth Jellys/2 Flash Spheres/2 Snooze Shrooms). Place the pair of items on the monitor as you normally would for concealment. (Place both items at the same time in the same concealment action.)
The Monitor promises to reveal something—a pattern, a code, a name—in exchange for relics from within the Lobby Levels.
2. Fractured Trust (Lv2):
While you have a companion in your Inventory, you must discard attack items equal to the Sanity gain they give you upon becoming your Companion (For instance, discard Attack items that deal 5 points worth of damage on Cosmonaut Tomac) then turn them face down in your Inventory.
Defeat 2 Companions to complete this challenge.
Once you have defeated 2 Companions, the next time the Void is revealed on the Field of Play, place both Facedown companions out of play.
3. The Breaking Point (Lv3):
The Monitor’s decide to test your strength, forcing you to use Death Shrooms while your Sanity is low, sending you to the brink of disaster and watching to see if you can rise again.
Defeat 3 Entities using Death Shrooms when your Sanity is 10 or less.
Being driven so low to the Brink of Insanity, you see a vision of a strange ephemeral creature from some indeterminate location within the static. Looking upon the entity, you suddenly see it turn to meet your gaze. Whatever you saw in the static… it saw you as well. Strange emotions rise within your chest, and the phantom seems to crawl around in the back of your brain. You fear for the worst.
---
The Phantom’s Arrival
No matter which path you take, you leave this place, marked.
At first, it’s just a feeling—a pressure behind you when no one is there. Then it’s a flicker in the corner of your vision, a shape that’s almost familiar. The next time you enter a hallway, the lights flicker, and your shadow moves just a little too late.
The Phantom is in. And now, it won’t stop following you.
As always, complete as many challenges as you can in a single run, and submit your escape in the weekly-challenge-submissions thread, Wanderers! We can't wait to see how you do!
Vid
📺 click me…
Collapsible content

Week Three: The Phantom’s Haunting
You’re not just dealing with the usual madness of the Backrooms. This time, you’re being hunted. A spectral entity lurks within the Lobby Levels, flickering in and out of existence, watching your every move. It is known as The Phantom—a relentless and otherworldly presence that cannot be fought like a normal Unfriendly entity. Instead, it must be confronted methodically, either by engaging it in battle across specific rooms, or by uncovering the secrets to banishing it for good.
But time is against you. The more you resist, the more the Backrooms twist around you. The Phantom isn’t just haunting these halls—it’s warping them.
Path One: The Phantom’s Pursuit
You choose to fight, but beware, for this is no ordinary battle. The Phantom entity must be tracked down to the specific rooms it’s bound to, then engaged and attacked multiple times before it can be finally be destroyed. After every attack, it vanishes, forcing you to press deeper into the labyrinthine layout of the Backrooms, while knowing that each encounter will sap your sanity and drain your resources.
If you're the type who prefers a direct confrontation, this is your path—but there's a catch. The Phantom isn't just some brute you can fight anywhere. It can only be engaged and damaged in specific locations, meaning you’ll need to navigate the Backrooms carefully, striking when the moment is right.
SETUP
To choose the Phantom, you’ll choose 3 Purple entities of your choice and shuffle them face down together. Then choose one randomly and keep it face down. Set it in the Next Level Deck zone. You may not look at this entity until specified. This Purple Light entity does not count towards your deck building light limits.
NOTE: Attacking the Phantom requires you to not be engaged with another entity when you choose to spend Sanity and attack it. Place the face down card from the NLD zone into your engagement zone, keeping it face down. Once you have attacked it, it will return to the NLD zone.
Strike in the Hallway (Lv1):
After entering a Hallway, you may spend 3 Sanity to engage and attack the Phantom. It deals 2 DIH damage and 2 Sanity Loss. After dealing at least 2 Damage, The Phantom vanishes from view. Place it back onto the NLD zone out of play. You must navigate to a Dead End next to be able to Engage and damage it.
Ambush at the Dead End (Lv2):
Once in a Dead End, you may spend 4 Sanity to engage and attack The Phantom again. It deals 3 DIH damage and 3 Sanity Loss. After dealing at least 3 Damage, you’ll flip the Position Token. If it lands Gem-Side up, the Phantom retaliates, dealing 5 Sanity loss. Then return it to the NLD Zone. You must navigate to a Destroyed Hall next to be able to Engage and damage it.
Trap it in a Dead End (Lv3):
In a Destroyed Hall, you can spend 5 Sanity to engage and attack the Phantom again, but here it becomes enraged. It deals 4 DIH damage and 4 Sanity Loss. Once you deal at least 4 Damage, the Phantom dissipates, nearly dead but still holding out for the final attack. Return it to the NLD zone. You must navigate to a False Wall next to be able to Engage and damage it.
The Final Blow at the False Wall (Lv3):
The last strike must be at the False Wall. Once you move into the False Wall, The Phantom is finally vulnerable. Pay 5 Sanity to flip it face up now and place it in your engagement zone. Follow normal engagement rules, losing sanity as shown on the entity and taking DIH damage as usual. Once it’s defeated, place it in the discard pile. The backrooms falls silent as the shadow of the phantom disappears for good.
This path is all about tracking, strategy, and timing. Are you patient enough to wait for the right moment to strike?
---
Path Two: The Phantom’s Banishment
You decide to take a different route. Rather than fighting it head on, you seek to unravel the mystery to banish it before it can overwhelm you. You learn from Freeman that the Phantom is bound to this place by cursed objects scattered across the Backrooms. If you can locate these special items and discard them in the right locations, Freeman hypothesizes that you might send it back to whatever void it crawled out of. Hopefully before it can drain you completely.
[The Hunt for Cursed Items]
You must locate four specific items to complete the ritual. NOTE: You may only have one of each of these in your deck:
Death Moth Jelly
Cloak Coat
Flash Sphere
Dumb Gum
The Phantom’s Rage (Lv3):
Until all four items are discarded, The Phantom continues to follow you and has the following abilities:
AGGRESSION: At the start of every round, lose 2 Sanity unless you discard an item.
FEAR: Each time you Deck Out, lose 5 Sanity.
RETALIATION: Once you place out the new No-Clip round (and finish placing out any Navigation Points you gained), if there are any entities, you must engage the one with the highest Sanity Loss.
[1st] Offering at the Hallway (Lv1):
Discard Death Moth Jelly in a Hallway to begin the ritual without using its effect.
Once discarded, The Phantom becomes less aggressive, reducing its Sanity drain to 1 per round.
[2nd] Shedding the Cloak in the Corner (Lv2):
Discard the Cloak Coat in a Corner to further weaken The Phantom.
This prevents it from using its Fear ability (Decking out does not cause Sanity loss anymore).
[3rd] Flashing Light in the Dead End (Lv2):
Discard Flash Sphere in a Dead End to reveal The Phantom’s true form, stopping it from using its Retaliation ability (No-Clipping does not force you to engage an entity).
[4th] The Final Offering at the False Wall (Lv1):
Discard Dumb Gum at the False Wall to complete the ritual and banish The Phantom permanently. Gain a Painite Gem upon banishing the Phantom.
Once this is done, you are free from its grasp and may finally find the Golden Stairs card and escape.
This path is all about exploration and resource management. Can you locate the necessary items and get rid of them before The Phantom drains your mind completely?
---
The Phantom’s Defeat... But at What Cost?
No matter which path you take, the end is the same—The Phantom is gone. The Lobby Levels fall silent. The air is still.
And then you realize something is wrong.
The space around you flickers and distorts. The air feels thicker, almost like you’re wading through something unseen. The very walls of the Lobby Levels tremble, their familiar forms warping—stretching, collapsing, reforming.
The lobby wallpaper dissolves, flaking away into drifting particles before vanishing entirely. The warm lighting dies, replaced by the harsh fluorescence of flickering overhead lamps. The soft carpet beneath your feet hardens, turning to rough asphalt.
Concrete pillars rise from nowhere, stretching into a ceiling lost in shadow. The endless hum of the hotel’s background noise is gone, replaced with an ominous silence.
And then—the cars appear.
At first, they are nothing more than hazy silhouettes, flickering between reality and something else. Then, they solidify, rusted metal and shattered windows taking shape before your eyes. Rows of abandoned vehicles stretch endlessly into the distance, their interiors dark and lifeless.
The Lobby Levels are gone.
You have fallen into the Car Park.
And the mystery only deepens.
Week 4: The Dark Vortex
Collapsible content

Week Four: The Dark Vortex
Welcome back to Week Four of the Challenge Season,
Last week, you dealt with the terrifying Phantom, who haunted you as you either searched for a way to fight it off or pursued a ritual to banish it from the Backrooms. After you successfully managed one of those two routes, the Lobby Levels began to shiver and change, and soon, things were rapidly turning in a way you couldn't have expected...
After dealing with the Phantom, the Lobby Levels convulse violently, their once-familiar structure unraveling before your eyes. The ornate hallways twist and buckle, their warm lighting flickering into an eerie, sterile glow. The soft carpet beneath your feet hardens into rough asphalt, and the elegant wallpaper peels away, revealing cold, gray concrete. Doors and corridors warp into towering support pillars, while distant chandeliers shatter into buzzing fluorescent lights. Worst of all, an unseen force pulls at you, dragging you deeper into this bleak, industrial abyss as the remnants of the Lobby Levels dissolve into the endless, hollow expanse of the Car Park.
You come to the realization that the Phantom was never the true horror. It was simply the shadow of something much larger, something Freeman has dubbed, “The Dark Vortex”.
A swirling, chaotic void of pure decay and horror, the Vortex does not hunt you like the Phantom did, nor does it think to chase. It simply exists—a supernatural rupture in reality that distorts navigation, warping safe paths into deadly traps and turning your own movements against you.
If you cannot find a way to escape it, you know only one thing for certain: it will consume you.
**NOTE: For this scenario, you must build a Car Park Level deck. There must be at least 5 Gem-Eligible Unfriendly entities in the deck.
**
Path One: The Vortex Breaker
You choose to fight the chaos. Not against the Vortex itself, but rather the horrifying entities that it unleashes upon you. The deeper you go, the more horrors emerge, drawn to the chaos and instability like moths to a flame. You must hold your ground, facing the nightmares spawned from the chaos and breaking through before the Vortex devours everything.
SETUP
Before the game begins, choose 3 random purple light entities to be the potential “Devourer of Paths”. **Shuffle these 3 and set them aside in a facedown pile in the NLD zone.**
1. Into the Abyss (Lv3):
- The second navigation point you place each round risks uncovering something—an enemy, a trap, or nothing at all. If you reveal less than 2 Navigation points during your movement phase, nothing happens.
- If you reveal an Unfriendly Entity, it causes your currently engaged entity to attack immediately (Before the action round has begun) or immediately engages you if you’re unengaged. Friendly entities do not trigger any effect.
- If it’s an attack item, it triggers suddenly, dealing DIH damage to you equal to its attack power.
- If it’s any other item, it fills your mind with visions of horror, dealing 3 Sanity loss.
- If it’s a room card or Outcome card, consider yourself lucky—no additional effects occur.
2. The Swirling Chaos (Lv3):
- You must defeat three Gem-eligible Unfriendly Entities with at least 4 Health before facing the final horror.
- Each time you defeat one of these Gem-eligible Unfriendly entities, place a navigation point in a space adjacent to your current position, and activate it according to the “Into the Abyss” challenge (Unfriendly entity engages you, attack item hits you for DIH equal to its power, other item deals 3 Sanity loss).
3. The Final Horror (Lv2):
- Once you’ve defeated three Gem-eligible entities, the Dark Vortex itself manifests an ultimate nightmare—The Devourer of Paths. Reveal the top card of the Purple Light entity stack you set aside before the game begins and engage with it automatically. It deals +1DIH Damage each round.
- This entity absorbs the second navigation point you would place out each Movement round, shuffling it back into the Pull Pile. If you only place 1 Navigation point in the Movement round, reveal the top card of your DIH and activate it according to the “Into the Abyss” Challenge (Unfriendly entity causes the Purple Light entity to attack you before the Action Round begins, attack item hits you for DIH equal to its power, other item deals 3 Sanity loss), then place the card back on top of your Deck in Hand.
- Defeat it, and gain an automatic Painite Gem. The Vortex begins collapsing, releasing its hold on your and allowing you to finally locate the Golden Stairs and escape.
This path is a test of endurance and tactical combat—can you outlast the Vortex’s tricks and take down the horrors
Path Two: The Vortex Manipulator
You recognize that this isn’t a battle to be won through brute force, but rather you intend to manipulate it in your favor. You must navigate the chaos, using the Vortex’s instability against itself, and take out some of these entities that are actively hunting you. By triggering the right anomalies, you may just be able to trick the Backrooms into letting you go.
1. Dancing with the Void (Lv3):
- Your objective is to trigger the Dark Vortex’s traps intentionally—but only when it benefits you.
- You must reveal four Attack items while engaged with an Unfriendly entity. Any of the Navigation points you place during the movement round can potentially reveal a trap item, Attack item, an entity, or nothing at all.
2. Tricks and Traps (Lv2):
-If you reveal an Attack item, you can redirect its damage onto an engaged Unfriendly instead of taking the DIH damage yourself. You must defeat at least 2 Entities using trap damage as the final damage.
-If you reveal an Item card, you lose 5 Sanity, and then may immediately place a navigation point anywhere on the field. If you reveal an attack item from this effect, you may use the damage from the attack item on an engaged Unfriendly entity.
If you reveal a room card, nothing happens.
3. Unraveling the Vortex (Lv3):
- With four traps sprung on unsuspecting Unfriendlies and two entities defeated by trap damage, the Vortex begins to collapse. The unstable energy is intent on taking everything with it, so you must escape before it makes you its victim!
-At the start of each Action round, reveal the top card of the Pull Pile and activate it:
- If you reveal an Unfriendly Entity, it causes your currently engaged entity to attack immediately (Before the action round has begun) or immediately engages you if you’re unengaged. Friendly entities do not trigger any effect. If the entity doesn’t engage you, discard it.
- If it’s an attack item, it triggers suddenly, dealing DIH damage to you equal to its attack power, then discard it.
- If it’s any other item, it fills your mind with visions of horror, dealing 3 Sanity loss, then discard it.
- If it’s a room card, nothing happens, it simply gets discarded.
- If it’s an Outcome card such as the Golden Stairs or the Void, shuffle it into your Deck in Hand.
Find the Golden Stairs and escape!
This path is about strategy, deception, and precision movement—can you outwit the Vortex and slip through its grasp before it consumes you along with everything else?
---
The Final Choice: Stand Against the Chaos or Slip Through the Cracks?
The Dark Vortex is relentless, warping reality in ways you can hardly comprehend amidst the entire scene of chaos. Will you fight your way through the horrors it spawns, forcing an escape? Or will you weave through the chaos, using its own distortions to take out the beasts that burden you before finally slipping out of its grasp?
One thing is certain—you have been forced to go too deep, and the Backrooms will not let you go easily.
Choose wisely, Wanderer. The void is waiting.
As usual, complete as many challenges from your chosen path as you can and submit your escape on the thread for validation by the team!
Good luck Wanderers, and keep on running!
The Backrooms TCG Team
SEASON 4 ENDED
Collapsible content
Ghastly Encounters
Welcome to the new Weekly Challenge, @Wanderer ! This is a mini Challenge season between the last major weekly challenge shift and the next season which will incorporate Car Park level cards.
In this first weekly challenge, you find yourself trapped in the labyrinthine depths of the Backrooms. Rumors are swirling about that some Wanderers are getting trapped by overwhelming forces. Here's what you need to know:
Before the Game:
Leave the Golden Stairs out of your deck at the start of the game.
You may only have 1 Lecture Hall in your deck.
Challenge Scenario:
While navigating the twisting halls of the Backrooms, you come across a fellow Wanderer who’s looking for a way out. You’ve heard horrifying tales of other Wanderers who met a gruesome end when they were ambushed by groups of terrifying entities, so you’re hoping to find someone who can provide a sense of safety to safely escape. Now, you face a critical choice:
Choose Your Path:
1. Engage the Entities
CHALLENGES:
Pain Mode (Lv2): All unfriendly entities gain Double Health and +1 DIH damage when engaged.
Maximum Painite (Lv3): You must gain 2 Painite Gems from Unfriendly Entities during your run. Once you do, shuffle the Golden Stairs into the Pull Pile and attempt to escape! When you defeat a gem eligible entity and gain a Gem, place the entity face down into your inventory. It counts as a physical item that must be carried.
Two’s Company (Lv1): Find a companion and escape with them by your side.
OR
2. Stealthily Sneak Past the Entities
CHALLENGES:
Unnatural Strength (Lv2): All Unfriendly entities deal double Deck-in-Hand damage while engaged.
Sapping Sanity (Lv2): All items cost an additional -2 Sanity to use, on top of any regular Sanity loss.
Lively Learning (Lv1): Find and enter the Lecture Hall. Once you enter it, shuffle the Golden Stairs into the Pull Pile.
Sneaky (Lv1): You must conceal 3 Unfriendly entities on the Field of Play.
Two’s Company (Lv1): Find a companion and escape with them by your side.
Collapsible content

Partygoers & Greener Pastures
Welcome back @Wanderer ! We have another exciting week of challenges for you with 2 distinct paths just like last week. Come join us to see how this week unfolds!
Weekly Challenge: Partygoers and Greener Pastures
This week, chaos reigns as Partygoers have begun to overrun the Backrooms. Their haunting melodies reverberate through every corridor, but you must decide how to handle them if you want to escape. Here's what you need to know:
IMPORTANT:
Include exactly 3 Partygoers in your deck.
Set Greener Pastures and the Golden Stairs outside the deck at the start of the game.
Start with the Void in your deck.
NOTE: You will technically have 53 cards, as the Greener Pastures and the Void technically take up the same slot.
Challenge Scenario:
The Partygoers have become a major nuisance, spreading throughout the Backrooms and haunting your every step. Their melodies seem to invade your mind, causing you to lose your mind slowly as you navigate your way through the liminal land of the Lobby Level.
You have two main options to try and escape:
Choose Your Path:
Endure the Partygoers' Haunting Melodies
Unrelenting Songs (Lv2): Lose 1 Sanity each round (even when no Partygoers are present), plus an additional 1 Sanity for each Partygoer on the field at the start of the Action Round. This is in addition to the normal Partygoer Sanity loss.
Super Mario Run (Lv3): While battling the Partygoers' effects, you must have 4 different Shrooms when you escape.
Flash Sphere Pro (Lv2): You must use the Flash Sphere 3 times, once for concealment, once as an attack, and once to navigate a Dark Hall.
Flash of Revelation (Lv 1): Once you use the Flash Sphere in all 3 ways, shuffle the Golden Stairs into the Pull Pile and attempt to escape.
Brain power (Lv1): You must exit the Backrooms with at least 15 Sanity.
OR
Assassinate the Partygoers and Seek Greener Pastures
Goal: If you want to find the treasure hidden in the beautiful Greener Pastures, you’ll need to defeat the Partygoers guarding it.
Small Pockets (Lv2): You’re forced to explore with Small Pockets, meaning you only have 3 inventory slots.
Unrelenting Songs (Lv2): Lose 1 Sanity each round (even when no Partygoers are present), plus an additional 1 Sanity for each Partygoer on the field at the start of the Action Round. This is in addition to the normal Partygoer Sanity loss.
Invite Only (Lv2): When engaging a Partygoer, you must search the Pull Pile and Discard for the first Partygoer you find and place it out on the FOP clockwise or counter-clockwise from your space. If there are none, you may skip this effect.
Watch the Party Die (Lv2): Engaged Partygoers deal 1 DIH damage per Partygoer on the field/in the engagement zone.
Partied Out (Lv1): Once you defeat 3 Partygoers, the next time the Void appears on the Field of Play (FOP), do not activate its ability. Instead, place it outside of play and shuffle Greener Pastures into the Pull Pile for a possible escape.
Collapsible content
War & Peace in the Backrooms
The Backrooms have grown restless. Entities of war roam the halls, seeking destruction, while whispers of peace linger in the shadows of forgotten mirrors. You find yourself caught between chaos and serenity. Will you embrace the tools of violence to carve a path forward, or will you use wit and restraint to survive? You awaken in a desolate corridor, the fluorescent lights buzzing faintly above. Scratches mar the walls, and distant growls send a shiver down your spine. In your pocket you find a note: "To win, you must play their game. To escape, you must change the rules." With each step deeper into the Backrooms, choices materialize. Hounds prowl unseen, their claws echoing on the tiles, and horrifying poison seeps out of random hallways, beckoning you to a quicker end. Every decision brings you closer to survival—or oblivion.
⚠️ IMPORTANT:
You must have at least 4 Poisoned Halls in your deck.
Add exactly 2 Hounds to your deck.
Challenge Scenario:
Path of War: Confront the Chaos
The Backrooms sends terrifying abominations your way. You decide to deal with them with the tools at hand, though the Hounds prove to be intolerable. Destroy them using the Backroom's hostile environment to your advantage.
Choose Your Path:
Death's Door (Lv1): Use 2 Death Shrooms before escaping. These volatile Shrooms can come in handy during a desperate situation.
Poison Expert (Lv3): Defeat 2 Entities using the Poison Hall as the only source of damage. Time your movements carefully to lure them to their doom.
Mirror Peace (Lv2): Deal at least 8 damage using Mirror Pieces. These shards are powerful but volatile, so use them wisely.
Max Sanity Intact (Lv2): Have 20 sanity when you escape the Backrooms. A sound mind is important after all the chaos you must endure.
OR
Path of Peace: Evade and Outmaneuver
If direct conflict seems too perilous, focus on stealth and evasion as you gather resources in preparation to escape. The Backrooms offer many ways to avoid battle, but at a price.
Silent Steps (Lv1): Use Liquid Silence on 2 different entities. Deaden your footfalls as you sneak about in your mission.
Extra Juicy Fruit (Lv3): Use Dumb Gum on 3 different entities. This Gum is a powerful weapon in the backrooms, allowing you to put the dangerous unfriendlies down before they get you!
Tilted Run on Hard (Lv3): End the game with 5 Sanity or less and 2 Liquid Pain cards in your Inventory. Sneaking about amidst the chaos is a tough task, and takes a toll on your Sanity as you traverse the dangers of the Lobby Level.
Goggle Master (Lv1): Exit the Backrooms with the Master Goggles in your Inventory. This advanced piece of tech can provide huge advantages while dealing with the Bright Halls and Dark Halls.
Good luck, Wanderers! Whether you choose war or peace, the Backrooms’ labyrinthine corridors will test your mettle. Your choices will determine if you escape unscathed or succumb to its endless horrors. As before, complete as many challenges as possible in a single attempt. Record your journey and share your escape in the #weekly-challenge-submissions thread. We look forward to hearing about your escape!
Stay safe and keep on running, Wanderers!
Collapsible content
Holiday in The Backrooms
WEEK 4
The Backrooms have been draped in an eerie sense of holiday festivity. Lights flicker like dying stars, random gifts of mysterious origins sit neatly and ominously wrapped in the shadows, and unseen carols echo through the hallways.
Challenge Scenario:
As you navigate this bizarre winter wonderland, you find yourself drawn into a strange game: a contest of giving and taking, where the stakes are your freedom—or your sanity. In this labyrinth of holiday chaos, even the Entities seem to celebrate in their own strange ways. The spirit of giving—or perhaps taking—permeates every inch of this liminal space. You feel a rush of something in the air, but is it the spirit of giving or the greed of receiving? You venture deeper into the festive liminal Lobby Levels to find out.
Choose Your Path:
Two Paths, Two Journeys 🎁
Path A: The Spirit of Sacrifice
Embrace the true spirit of the giving season by parting with your precious items to forge alliances, appease Entities, and unlock the way out. In this journey, the key to survival is generosity and sacrifice. Every gift, every item relinquished, is a step closer to freedom—though it will test your resourcefulness and resilience.
Challenges:
Meeting with Aiden (Lv2): Encounter Aiden twice during your journey. On one of these meetings, you must offer Aiden a Painite Gem as a gift. This helpful guy knows tons about the Backrooms, and is excellent at navigation. Give back to the entity that’s always ready to help out!
White Elephant Party for the Arch-Raven (Lv2): Gift the Arch-Raven Death Moth Jelly during two separate encounters to gain its favor. This bird loves to give gifts, and also endlessly desires its favorite jar of Death Moth Jelly.
Gift for Doll Face (Lv1): Delight (Conceal) the cheery Doll Face entity with her favorite, some Almond Water, while she’s on the Field of Play. She frolics about the Lobby Levels, always searching out her favorite source of refreshment.
Paper Snake Party (Lv2): Engage the Paper Snakes and sacrifice a Painite Gem and an item to it over one or more encounters. These don’t need to be in the same encounter. Even the Paper Snakes get some holiday cheer!
Truly Empty Pockets (Lv2): Escape the Backrooms without any items in your inventory. Items may not be discarded unless actively used or discarded due to taking a fifth item. To embody the spirit of giving, you must leave as light as you came, Wanderer.
Path B: The Gift of Taking
Take what you need from the Backrooms, forging alliances with benevolent Entities and using clever tactics to collect treasures to aid your escape. In this path, survival hinges on strategy and accumulation. You must navigate the Backrooms wisely, using every encounter to gain items that can help you escape, while managing the cost of survival in this treacherous holiday maze.
Challenges:
Death Moth Delivery (Lv1): Gain 2 items from encounters with Death Moths. These little helpful ones deliver the gifts you really need when you’re running low!
Starving Void (Lv2): Lose 2 items from your Inventory to the Void before escaping. The Void is hungry for a helping of presents, so give it what it wants to appease its bottomless appetite.
Friends with Grawlix (Lv2): Obtain 2 items from encounters with Grawlix. You’ll need to run on low sanity to manage this, so carefully choose your opportunity when it arises!
Clocksmith’s Holiday Treasury (Lv2): Gain a total of 4 items from encounters with the Clocksmith. This mysterious fella often has nuggets of wisdom to dispense, as well as some valuable items should you choose to leave him with his Painite Gem.
Turning the Frown Upside Down (Lv2): Use Memory Fluid to appease a Frowner Entity during two separate encounters. Even the Frowners need love this holiday season, so appease their mind with some Memory Fluid cologne and let their sorrows fade into holiday cheer.
Which path will you choose, Wanderer? Will you truly embody the spirit of giving and win your freedom through sacrifice and emptied pockets, or will you seize the treasures of the season and escape with arms full? The choice is yours—just beware of what unseen creatures lurk in the holiday halls of the Backrooms. As before, complete as many challenges as possible in a single attempt. Record your journey and share your escape in the weekly-challenge-submissions thread. We look forward to hearing about your escape!
Stay safe and keep on running, Wanderers!
Collapsible content
The Countdown Dilemma
WEEK FIVE
As the faint glow of flickering lights and the hum of ominous machinery mark the passage of time in the Backrooms, you stumble into a space that seems... different. It's New Year's Eve—or, at least, the Backrooms version of it. Strange echoes whisper of a "Countdown," and a clock on the wall ticks ominously, stuck at 11:59.
Before you can catch your breath, the Clocksmith appears. He eerily stares at you before offering a cryptic warning: “Choose your path wisely, for only by committing to it can you find the Path to your freedom. Any resistance or hesitation will shatter what remains of your sanity.” Two enigmatic hallways materialize before you, each glowing faintly with a pulsating light. Both hold the promise of escape, but their challenges are steep.
Challenge Scenario:
IMPORTANT
All Unfriendly and Dual-type entities in your deck must be Gem eligible (Have the Painite Gem icon at the top).
Collapsible row
Choose Your Path:
Path 1: Wrath of The Abyss
The Clocksmith speaks again: “Take this route if you dare test the limits of your survival. The darkness will taunt you, but only through the void can you find your way." As you move through this path, the air grows heavy with dread. You feel the gaze of lurking entities on you even when none appear around your immediate area, and every step you take echoes endlessly into the void. The void’s energy weakens your attacks, making every encounter more dangerous. Your only hope is to outmaneuver the lurking Entities and reach the end before your shared Sanity hits zero.
The Entity Next Door (BigTasty) (Lv2): Whenever you lose DIH to an Entity while engaged, your Sanity drops by the same amount. Every engagement in this place drains both your mind and your body. Prepare yourself to suffer, but through suffering, find your salvation!
Weakened by the Abyss (LuckyLogan) (Lv3): While the Void is on the Field of Play, all attack items deal half damage (rounded up). When defeating a Gem eligible entity, reveal the top 5 cards from the Pull Pile. If the Void is among them, place it out onto the Field of Play in either space next to your current room. Place the rest of the revealed cards onto the bottom of the Pull Pile.
NEW
[4:58 PM]
Shocking (LuckyLogan) (Lv2): Defeat two Entities with at least 4 HP using only Shock Shrooms. These powerful paralyzing shrooms can knock many entities down to size for a round before they regain their strength. Use that brief window to strategize!
Trapped (LuckyLogan) (Lv3): Have at least 4 Dead Ends on the Field of Play at the start of your Movement Round. These cursed Cul-de-sacs can stop you dead in your tracks. Watch out for them or you may find yourself cornered!
Path 2: The Clocksmith’s Gambit
The clock ticks louder now, as if urging you to act: “This path will test your resourcefulness. Can you beat the clock before it beats you?” This path is fraught with urgency. The clock is stuck, but the ticking never stops. The pressure builds with every second, forcing you to think fast and act faster. The Clocksmith appears at random intervals, offering you peculiar items that have a devil’s price attached: your own mind. His intentions remain unclear but his treasures have their usefulness. As you face each Entity, it feels like time itself is bending against you, daring you to keep going.
Items of Time (LuckyLogan) (Lv3): Receive four items from the Clocksmith. Each item you receive drains your sanity by 3 extra, in addition to the -5 Sanity loss from encountering the Clocksmith. Time is on your side... but can your Sanity last these treacherous encounters?
Hide and Seek (LuckyLogan) (Lv2): Enter a False Wall while engaged with an Entity twice before you escape. The False Wall can be a huge boon when you’re stuck facing down a horrifying creature. Use them to your advantage!
Ambush! (LuckyLogan) (Lv3): Every time you defeat a Gem-eligible Entity, flip the position token. If it lands Gem side up, immediately engage another entity on the Field of Play, or engage the first entity you find from the Pull Pile. When gem-bearing entities perish, sometimes they draw more enemies to you, forcing you into a corner.
Spider Slaughter (LuckyLogan) (Lv2): Defeat two Tsuchigumos before escaping. This mythological spider from Japanese folklore haunts you through the Backrooms. Her webs slow your progress, but her defeat is an essential piece of making it out alive.
Path 1 is a battle of endurance and cunning. Your ability to manage Sanity and navigate the void’s oppressive influence will determine your survival.
Path 2 demands swift decision-making and creative problem-solving. The clock’s constant pressure forces you to stay sharp, but the rewards may be worth the risk.
Regardless of the path, you must escape the Backrooms together before your Sanity reaches zero. Choose wisely, complete the challenges, and find the exit—or become another story whispered in the halls of the Backrooms.
Collapsible content

New Year, New You
WEEK SIX
Scenario Designed by Groyer
After a year of exploring the Backrooms and doing experiments for Freeman, the new year is finally here! As you enter a hallway for what seems like the umpteenth time, the Four Faces appear before you. Instead of attacking you all at once, they spin around you and a voice echoes in your ears: “HAVE YOU LEARNED?” As images flash in your head about the journeys you’ve taken in the last year, another voice rings: “WILL YOU CHANGE?” and following that, you see flashes of an unfamiliar concrete labyrinth. As the voices and images fade, you look up to find yourself alone at a crossroads. Scrawled words lie at your feet with arrows pointing left and right that say “FIGHT or FLIGHT?”.
Challenge Scenario:
Deck Requirements:
At least 1 each of the Four Faces (Frowner, Smiler, Blusher, Laughter).
Max of 1 friendly Entity.
Companions are banned.
Start with the Golden Stairs out of the Pull Pile.
!! Depending on the path you pick, other requirements apply.
Choose Your Path:
Path 1: Confront the Past, Resolve to Change
You decide to confront your fears and face them head on. By putting your past demons to rest, your path to the future will be clear.
Additional Deck Requirements:
Concealment items are banned. False Wall is banned.
Frowner’s PP score is DiH damage for this challenge. You may flip for a Gem when defeating it.
You may not use items to conceal other entities if they allow it (i.e. You may not use a Flash Sphere for concealment but using it for combat or navigating rooms is fine).
Challenges:
Face Your Failures (LV3): Defeat each of the Four Faces once. When you do, shuffle the Golden Stairs into the Pull Pile.
Sinister Expressions (LV3): Each of the four Faces do +1 DiH damage, and an additional +1 for every additional Face on the Field of Play and in the Discard Pile.
Warpath to the Future (LV2): Defeat six entities before leaving.
Stocked and Loaded (LV1): Leave with four attack items in inventory.
Path 2: Forget the Past, Resolve to Start Over
Running at your problems headfirst won’t make them roll over and change. It’s best to move on from the past and start with a clean slate.
Additional Deck Requirements:
Exactly 1 Lecture Hall, False Wall and BSCOS Device. Start with BSCOS Device out of the deck.
Attack items are banned (this includes items like Gold Tape and Dumb Gum that “defeat” enemies).
When entering the Lecture Hall, shuffle the BSCOS Device into your Deck in Hand.
Challenges:
Face Towards the Future (LV3): Conceal or discard each of the Four Faces once using items or rooms. Turning the Frowner into a room with Memory Fluid counts towards this achievement.
Ignorance Is Bliss: (LV2): Conceal six entities before leaving.
New-Wave Research (LV2): Finding & using the BSCOS Device shuffles the Golden Stairs into the Deck in Hand before the BSCOS Device effect resolves. It also gives you a permanent Painite Gem so you can escape.
A Fresh Start (LV2): Escape with no items in inventory and max Sanity.
These two unique paths present their own restrictions and challenges. The only real question is, will you face the future, or will you be demolished by the past? As before, complete as many challenges as possible in a single attempt. Record your journey and share your escape in the weekly-challenge-submissions thread. We look forward to hearing about your escape!
Stay safe and keep on running, Wanderers!
Collapsible content

A Test of Resolve
WEEK 7
Scenario designed by Groyer
Wandering through the Lobby Level, Mr. Freeman has given you directions to move onto the next area known as “The Car Parks”. He explained that going there is the next step on your journey to escaping the Backrooms for good.
As you turn a corner, you see an entryway into what looks like a parking deck. You are suddenly assailed with flashes of light and the sound of car horns going off in your ear. A figure with a long coat and a red scarf beckons you to follow, but you stumble over in your daze. As you look up, you aren’t greeted by that coated figure but someone far more menacing: the Scarlett Knight.
She stands in front of the door, blocking your way. In her hand, she holds a warped steel pipe that is worn with rust and held together with tape and gauze. She tosses it towards you, and it clatters towards the ground. ”Pick it up.” she says, as she turns and closes the portal behind her. ”Earn the right to be free. Show that you can fight like he once did, and earn your freedom.” Instead of killing you where you stand, she vanishes. Only you and that tattered pipe are left in the buzzing corridor you have become so familiar with.
Challenge Scenario:
Deck Requirements:
One copy (max.) of Scarlett Knight.
You must have the Car Park Portal as an Exit.
!! Depending on the path you pick, other
Choose Your Path:
Path 1: Steel Thyself
You grab the pipe and grit your teeth. If she wants proof that you can handle yourself then she’ll get it. The pipe reacts to your anger and glows warm in your hands, as if it recognizes your desire for a fight. In some way, you’re relishing the chance to let loose and bust the place up. You also remember Mr. Freeman mentioning the Gem being used for other purposes beyond resonance with the Golden Stairs, and look at the pipe with an idea brewing in your head…
Additional Deck Requirements:
One copy (max.) of Hex Pipe. If you don’t have one, a Mirror Piece will do. It will function exactly like a Hex Pipe and be considered Yellow rarity. Consult the online gallery for card details.
One Ancient entity that isn’t the Ancient Conductor.
Start with Scarlett Knight and the Car Park Portal out of the Pull Pile.
Start with the Hex Pipe in your inventory. You cannot lose it in any way. You must pay the cost to return it to Inventory every time it is used, but it costs 3 Sanity instead of 6.
Challenges:
Ravenous Hex (LV1-3): By sacrificing a Painite Gem, the Hex Pipe gains a permanent +1 damage to the initial hit, lingering damage and Sanity damage to you when it returns to the Inventory. Do this up to three times to max out the modifier at +3.
Ancestral Bloodright (LV2): Defeat an Ancient entity with only the Hex Pipe. Afterwards, shuffle the Scarlett Knight into the Pull Pile.
I Fought the Law (LV2): Defeat Scarlett Knight with only the Hex Pipe. Afterwards, shuffle the Car Park Portal into Deck in Hand.
The Heat of Battle (LV2): Entities do +1 Deck in Hand damage while taking damage from the Hex Pipe.
Path 2: In The Shadow of the Knight
You stand and leave the pipe on the floor, the malicious aura oozing from its worn frame. Hopelessness sets in as you dread having to face Scarlett, when her words linger in your head. She mentioned someone else with great strength who she may have seen as an equal, or perhaps a rival. You remember Mr. Freeman saying the Hopper Devices have a second function, to serve as an emergency beacon to call forth “a friend of great strength”, and that’s your ticket out of this mess. It doesn’t make much to figure out who they're talking about and you set off to find him.
Collapsible content

No-Clipping into Wonderland
WEEK EIGHT
The Red Queen, Scarlett Knight, has drawn you unwillingly into her twisted Wonderland, a distorted realm of the Backrooms where reality bends to whimsy and chaos. Here, the Mad Hatter, an Ancient Conductor, orchestrates havoc, and madness seeps into every corner. Amidst the unending lunacy, Cosmonaut Tomac, your white rabbit guide, may offer glimpses of a possible escape from this horrifying place. Alternatively, the enigmatic Cheshire Clocksmith might reveal the secrets of time itself, should you choose to follow him into the darkness.
You stumble into a grandiose hall, the checkered floor stretching infinitely in all directions. The Red Queen Scarlett Knight sits atop her throne of roses, her eyes aflame with imperious wrath. “Welcome to Wonderland, Wanderer,” she declares. “You play my game now. Survive if you can, or succumb to the madness.”
In the blink of an eye, you find yourself randomly teleported to elsewhere in this liminal wonderland. In your peripheral vision, you catch a mischievous grin fading into the void. The Cheshire Clocksmith appears, his mechanical tail ticking ominously. “Tick-tock,” he says. “Your time here is both fleeting and infinite.” Then he vanishes, leaving you alone in the darkness. With every step, Wonderland shifts, the halls of the Backrooms warp into impossible shapes. The choice is yours: fight against the madness or solve the mysterious riddles and overcome the guardians of the Pasture.
Challenge Scenario:
IMPORTANT:
Set the Golden Stairs, Greener Pastures, Cosmonaut Tomac, the Clocksmith, and the Scarlett Knight to the side before the game begins. These do not count towards your deck building.
You must have four facelings and the Ancient Conductor in your deck.
Choose Your Path:
Choose Your Path:
Path 1: Court of Madness and Violence
Defy the Red Queen and the chaos of Wonderland. Battle the Mad Hatter Ancient Conductor and the Red Queen Scarlett Knight and deal with the horrifying madness before finding the White Rabbit Cosmonaut Tomac to have him guide you to the Golden Stairs exit.
Hatter’s Havoc (Lv3): Engage and defeat the Ancient Conductor. While engaged with the Ancient Conductor, whenever you use an attack item on him, flip the position token. If it lands Gem side up, you lose -5 Sanity unless you place the top card of the Pull Pile into your Inventory face down as a Madness Token. Any additional Madness tokens can occupy the same space in your Inventory. You may discard a Madness token by losing 5 Sanity, limit once per Action Round. Once you defeat the Ancient Conductor, shuffle the Scarlett Knight into the Pull Pile.
Madness Tokens (Lv2): For every Madness Token in your possession, lose 2 Sanity or take 1 Deck in Hand damage at the start of each Action round.
The Queen’s Gambit (Lv3): Engage Scarlett Knight. Gain a Madness token upon engaging her. She deals 1 additional Deck in Hand damage for each other entity on the Field of Play at the start of the action round.
Escape the Madness (Lv1): After defeating Scarlett Knight, shuffle Cosmonaut Tomac and the Golden Stairs into the Pull Pile, then find him and add him to your Inventory as a Companion and escape through the Golden Stairs. The Golden Stairs now costs 10 Sanity to move into.
[4:14 PM]
Path 2: Guardians and Riddles
Defeat the Faceling Guardians and solve the Cheshire Clocksmith’s riddles to unlock the location of the White Rabbit Tomac to locate the Greener Pastures, away from the unceasing madness of the Scarlett Knight’s horrifying court.
Pasture Guardians (Lv3): All Facelings gain +2 Deck in Hand damage, +2 Health, and 2 Extra Sanity Loss upon engagement. Defeat 4 Facelings. When engaging a Faceling, place the top card of the Pull Pile into your Inventory face down as a Madness Token. Any additional Madness tokens can occupy the same space in your Inventory. You may discard a Madness token by losing 5 Sanity, limit once per Action round. Once you defeat all four Facelings, gain another Madness token and shuffle the Clocksmith into the Pull Pile.
Relic Hunter (Lv2): Have 4 unique items in your Inventory. Once you do, shuffle the Clocksmith into the Pull Pile.
Cheshire’s Challenge (Lv2): When you engage the Clocksmith, after drawing two items from his ability, you may choose to only receive 1 of them. Discard the other. Once you do this twice, you have solved his Riddle. Once this is achieved, shuffle the Greener Pastures and Cosmonaut Tomac into the Pull Pile.
Final Exit (Lv2): Have Cosmonaut Tomac as your Companion when you escape through Greener Pastures. Greener Pastures now costs 18 Sanity to move into. Once you do, you have escaped from the Red Queen and her abysmal court.
Good luck, Wanderers! Wonderland’s corridors are as treacherous as they are whimsical. Will you challenge the court of madness or lose yourself in the siren call of Greener Pastures? The choice is yours.

Collapsible content
Collapsible row
Collapsible row
Entry 1.0
**CHAPTER ONE (Week One)**
There has been a rumble in the Backrooms lately. The usually bleak and terrifying place seems nearly desolate, as though it were the calm before a swelling storm. Something about the endless yellow hallways seems to infinitely yawn like a multitudinous abyss. Something is coming…
You have lately had terrible dreams of the place, somewhere you have slipped into before in past dreams, though how long ago back you weren’t sure. You met many strange creatures and found bizarre relics, and just when things seemed hopeless, you would wake up, drenched in sweat and feeling like eyes were upon you in your bed. As horrifying as it was, it also held a strangely hypnotic power, like it was transmitting some kind of signal directly into your brain that pulled at the edges of your mind. A dark shape would foment within the creases of your brain, an ever-changing embodiment of chaos that flung you about like a rag-doll before you suddenly woke back up in the real world. You wonder if this is a portent of things to come, or just a strange dream brought on by the stories you read online of the Backrooms.
But then, one day right before you fell asleep, you felt air rushing around you, and you were falling. Down you went, like Alice into the rabbit hole, and with a start, you were back there again… back in the Backrooms. The familiar moist carpet, the monotonous buzzing above by fluorescents that seemed always ready to plunge you into darkness as they buzzed on and on. That dull yellow wallpaper with the plain chevrons. The dream wasn’t a dream!
You pushed yourself to your feet, moist carpet squishing unpleasantly against your fingers and knees. It felt like the carpet itself was humid. So gross. Your clothes were a bit damp, but luckily not too much. You often fell asleep clothed after getting back late from work every night, and would just fix yourself up the next morning, so you at least had some pockets to work with. You searched your pockets but came up pretty light. A notepad and pen, your mostly dead phone, a picture of your cat. Nothing especially helpful. Then you heard the screaming.
It was difficult to tell where it was coming from, but it echoed all around you. You felt claustrophobic, encased by the endless howling. As you wandered down hallway after hallway, the screaming died down as you walked into a large clearing. Everything was suddenly so quiet, that you could have heard a pin drop. As your ears finally stopped ringing, you noticed that the wide open space held a podium at one end and rows of seats on the other. It was a Lecture Hall. You’d been here before in some dream on some random night in the past. Many times in fact. You closed in on the speaker’s soap box, that wooden stand upon which all eyes would be focused during the course of a class. How normal that felt when everything else about this situation certainly didn’t.
As you stepped up to the wooden platform, you noticed a set of notes stashed in a small drawer on the podium. You scanned the front page: Freeman’s Report. Glancing through the pages, you found several interesting insights. This was research done by somebody named Freeman and was filled with sketches of strange entities you’d glimpsed in the past, monsters and people alike. Strange items you gleaned were also laid out here, espousing good and bad habits to have in this place. Armed with these papers, you might survive this situation. For now, you decided it would be best to look for an escape. Freeman’s report noted the Golden Stairway, a portal of some kind that could potentially lead you back to the real world. But how? You read on.
Entry: 1.1
It looked like it would require a key of some kind called a Painite gem. This was used to dissipate the Painite Field that surrounded the Golden Stairs. To gather one of these gems, you would need to defeat one of the dangerous entities in this place. How? The guide also showed weapons you might be able to find and use. Weird Mushrooms, a mystical Mirror, a bottle of explosive liquid, the list seemed to go on for all the weird but useful stuff here. This was going to take some time, but no time like the present!
Freeman had scrawled a small series of scribbles at the bottom of the Golden Stairway section, noting that while it could lead you back to the real world, sometimes it actually seemed to link to other places within the Backrooms itself, though he couldn’t be certain why. He guessed that the chaos of this place just had a way of messing with those who fell into it, like it consciously sought to disturb and horrify those unlucky enough to find themselves stuck, like yourself…
You investigated the notes a little more, finding a few more important clues: Freeman referenced a Loop of some kind. This place was an unnatural labyrinth made up of an unknown number of strange parallel levels, many of which could seem the same but also had their own distinct differences. These separate levels sometimes would look identical, but these were layers of the labyrinth that, like a lock, required multiple steps in a particular sequence to see actual success in your escape attempt. You didn’t understand this at all, so shaking your head, you continued.
There was an ominous note about a particular creature here as well known as the Faceling. In this level, Freeman noted he stumbled upon one of these entities that seemed to grow in power once it was defeated and rose to fight again. Therefore, it would need to be defeated twice before it would go down. However, the properties of this place meant even after being defeated twice, it may possibly resurrect and reappear in its more powerful form. This was what Freeman called the Loop. If the Loop ran out, it could return. It would be a desperate struggle to escape, both from the creature and from the Backrooms, but waiting around would you get nowhere.
Freeman also had a note about friendly entities known as Death Moths. These unusual butterflies were said to lead Wanderers to helpful items that could ensure one’s survival for longer, so you were keeping your eyes open for any of those.
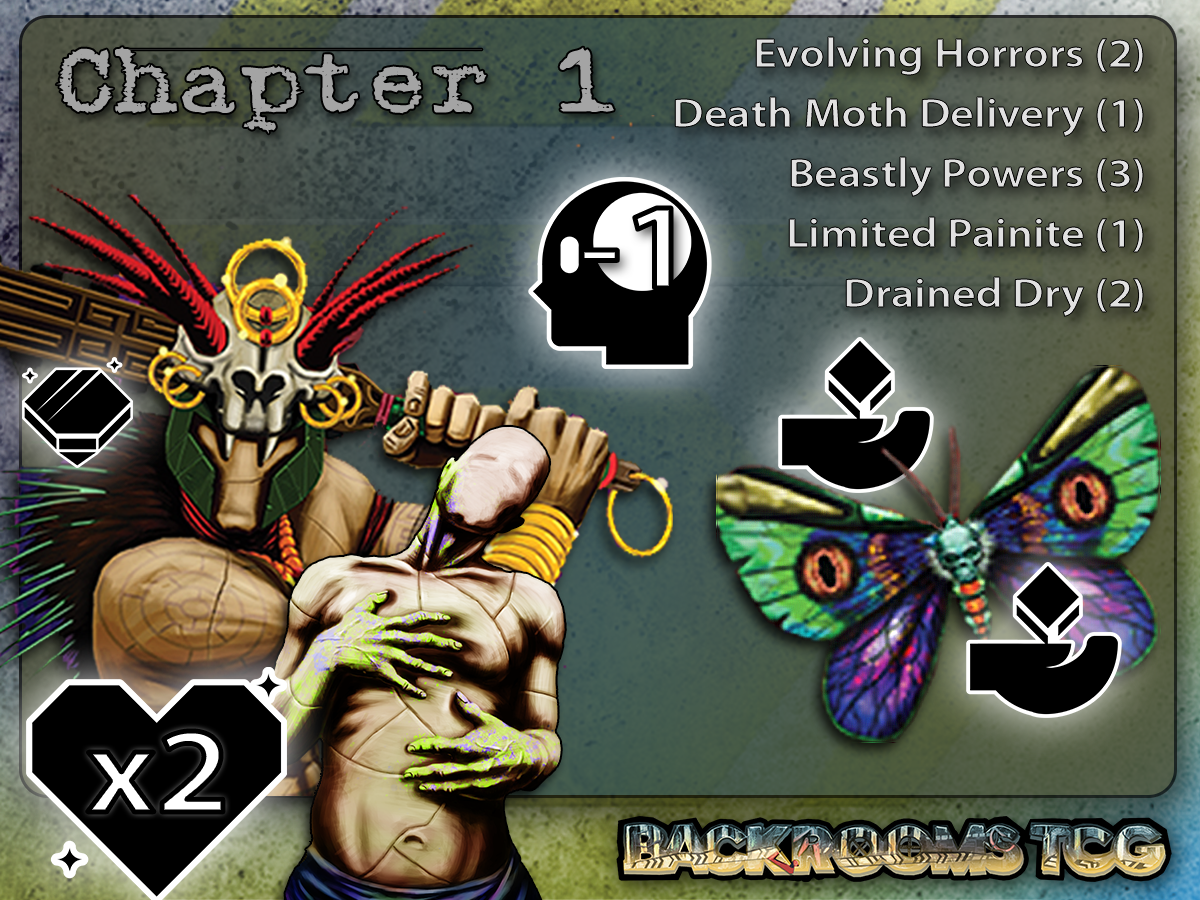
Chapter One: Faceling Showdown
Required: Faceling (MAX 1), Ancient Faceling (MAX 1), Death Moth (MINIMUM 1)
[NOTE: When building your deck, consider the Ancient Faceling the 11th entity.]
Set-up: Set the Ancient Faceling aside out of play.
Goal: You are trapped in the Backrooms. Reading Freeman’s notes has led you to your first objective: Find and Defeat the Faceling and then the Ancient Faceling it evolves into before you escape. Also, find 2 items from Death Moth encounters.
Special Rules:
Once you defeat the Faceling, set it to the side out of play and shuffle the Ancient Faceling into the Pull Pile.
Challenges:
Evolving Horrors (Lv 2) (NowayArtemus): Defeat the Faceling and then the Ancient Faceling before escaping. (Once you defeat the Faceling, instead of placing it in the discard pile, set it aside out of play and shuffle the Ancient Faceling into the Pull Pile, and continue playing.)
Beastly Powers (Lv 3) (NowayArtemus): The Faceling and Ancient Faceling both have Double Health, as well as any other entities that would normally provide a possible Painite Gem. This Faceling/Ancient Faceling incarnation is much tougher than normal Facelings, so watch out!
Death Moth Delivery (Lv 1) (NowayArtemus): Receive 2 items from Death Moth encounters.
Limited Painite (Lv 1) (NowayArtemus): You only receive a Painite Gem after defeating the Ancient Faceling.
[SPOILER] Once you Enter The Golden Stairs [SPOILER]
As you finally catch sight of those Golden Stairs, you reflect on your journey. Finding the strange notes, “The Freeman Report” as it had been titled. The strange endless rooms. Those bizarre and horrifying entities you’d encountered. That horrifying Faceling that just wouldn’t die, and then had the nerve to get even scarier by glowing up. You thought back to when you were fighting it…
Landing that last blow on that terrifying Ancient Faceling felt like a lightning strike of relief as it finally toppled over. You put a foot against its side, and with a grunt, flipped the monstrous entity over onto its back. You noticed an ethereal glow in the center of the Ancient Faceling’s chest.
You reached down, pushing aside the tattered layers of fabric to find a small circular amulet hiding within the folds. It was like a red, unblinking eye, beautiful and unnerving. What it took to get this thing… It caused an involuntary shiver to ripple through your spine.
You remembered reading about the Painite Gem that could be found when one of these entities was defeated. Perhaps you were unlucky, but the Painite never showed up when you took down any other Entities, only the Ancient Faceling. But the Painite… it was certainly something else. Just as Freeman’s report had described it, it gave off a strange red glow that throbbed like a heartbeat in the hazy darkness. In the notes, you’d noticed a handwritten scrawl that this may have been due to the dark force holding the gem having a kind of corrupting influence on it, causing its shine to dull immensely.
But once the gem had been freed, it would shine in a dazzling way that was hard to describe. The darkness, normally seeming to swarm around you, felt as though it was softening a bit, almost like the room had grown ten percent brighter. This thing had some power… you could feel it.
In a flash, you were back on the stairs, your head swimming with a million thoughts. You were exhausted, face soaked in sweat, ready to get back to real life and out of this dizzying, hellish maze. You brace yourself as you head up the stairs, but surprisingly feel yourself lighten with each passing step. As you near the top, the glow is so piercing that you are forced to squeeze your eyes tight and rush up. Finally, you push the door aside…
Then you come to… in the Lecture Hall.
What?
You blink, hardly believing it. You’re standing next to the podium again, looking out at the empty seats. You look down and notice a set of notes stashed in a small drawer on the podium. You scanned the front page: Freeman’s Report. Oh no… now you realize what Freeman meant when he said there was a loop. You’re in it.
You flip through the notes again, looking for anything you missed the first time through.
In the back of the book, you see a photograph of a young guy with a TV for a head called “Aiden”, and on the back of the photo were a few sentences. "Curious young entity, he wishes to free that creature of its bonds. Helping him may help us find the box. Also, must test out the gum. Entities seem to be growing stronger by the day." So, without any further leads, you steel your mind and brace yourself. It was time to find this Aiden. Perhaps he could lead you out of here or, better yet, help you find this Freeman so you could get answers. If anyone might know why you’d kept seeing this place for years on end in your hazy dreams, he might be it. With certain steps, you start on your journey. (edited)
[3:31 PM]
That was quite a journey! It looks like next week, you must find Aiden and help him in his quest, and hopefully find Freeman shortly after that. Prepare for the next leg of your adventure, Wanderers!
And like last season, complete as many challenges as you can in a single attempt, and record your journey by submitting your escape in the weekly-challenge-submissions thread for validation by our crew!
Epilogue
That was quite a journey! It looks like next week, you must find Aiden and help him in his quest, and hopefully find Freeman shortly after that. Prepare for the next leg of your adventure, Wanderers!
And like last season, complete as many challenges as you can in a single attempt, and record your journey by submitting your escape in the weekly-challenge-submissions thread for validation by our crew!
Collapsible content

Entry 2.0
You decided to chart a course to find Aiden in this strange place. Though the Backrooms seemed infinite, it also seemed like things had a way of connecting back to themselves. You’d sometimes find yourself running into the same strange people over and over again in those fuzzy dream memories. You’d be thinking of their face out of the blue, and they would appear as if you’d willed it. You weren’t sure if this was some kind of an accident that seemed to loop, showing itself over and over again, or if this were all a coincidence. Chaos did seem to have a way of following you around.
You could swear you’d seen this Aiden before, buried in some far-off dream… His face looked so familiar. You pictured his face in your mind as you wandered down hallway after hallway. Maybe your odd connection to the Backrooms through all the dreams you’d had of it was more than just a running theme of your nightmares? You were trapped here, so what else did you have to do? As you continued moving, you felt something compelling you in various directions. Instinct, or something deeper?
You heard the laughter not too far after that. Out of a dark hall came rushing up to you a little guy with a TV for a head. This had to be Aiden! But how?
“Hey there! Don’t I know you?” His voice came out through the TV on his head in a rush, slightly high-pitched but with a sense of certainty you certainly didn’t feel down here. “Or maybe not, but you look familiar… Anyway, there’s no time! I need help!”
He was frantic as you two chatted, quickly asking if you could lend a hand to his latest mission. He confirmed he was indeed Aiden and you showed him the picture you’d found of him. He told you that this was a deeply chaotic place but that chaos could be directed by a special few, like the Conductor. He had a dark power within him that twisted and corrupted all things that he touched. There was a poor creature that the Conductor had gotten his hands on, an old friend of Aiden’s from a place outside of this particular level of the Backrooms.
“Ever since the Conductor did that to him, I’ve made it my mission to find him and put him at peace. He’s been malformed into a Frowner, a creature that exists solely in a space of infinite gloom in the twisted form they’ve been forced into! It’s monstrous!” Aiden’s face on the TV scrunched up into a horrified grimace. “So, will you help me?”
Looking at Aiden’s face, you knew you couldn’t say no. The Conductor had the power to do almost anything in this place according to him, so you knew you would need to be careful. But he seemed like he had a plan, and Freeman seemed to have some sense of trust in him as well, so you figured you might be alright. The mission required a special substance called Memory Fluid, which would be able to help the Frowner regain their old memories and could thus dissipate and fade out of existence.
In this way, at least Aiden’s friend would be at peace, and not in this state of eternal torment. Aiden also needed to find something called the BSCOS Device for this Freeman guy. It was supposed to be a very powerful item that could cause a ripple through the entirety of the Backrooms, and possibly disrupt the Conductor’s Influence for a short time. Also, there was something called Dumb Gum, and Freeman had asked if Aiden could use it multiple times to test its effectiveness on various entities.
You agreed immediately to this genuine and heartfelt plea. Aiden said an extra set of hands, especially from somebody who had seen the Backrooms before and still managed to wake up the next day, would be a huge help. Just then, a massive rumbling swept through like a huge earthquake. Portions of the ceiling suddenly started breaking off and crashing all around you two. A large section of the wall crumbled next to you and rubble came rolling out, separating you and Aiden. Was this the chaotic power of the Conductor? (edited)
[5:17 PM]
“You go, Wanderer! Be careful and trust your instincts. We’ll find each other soon!”
Chapter Two: Echoes of Despair in the Hallways of the Dying
Required: Dumb Gum (2 Max), Aiden (1 Max), Frowner (2 Max), BSCOS Device (1 Max)
Set-up: Standard Setup
Goal: Help Aiden release the tormented Frowner. Meet with Aiden multiple times, giving him a Painite Gem on one of your encounters. Find and use the BSCOS Device, and also use the Dumb Gum 3 times. Beware of the extra power entities have!
Challenges:
Search for the Cube (Lv1) (TheRedTide): Find and use the BSCOS Device.
Extra Juicy Fruit (Lv3) (NowayArtemus): Use the Dumb Gum on 3 entities.
Freeing the Frowner (Lv2) (TheRedTide): Use Memory Fluid on Frowner.
Aiding Aiden (Lv2) (NowayArtemus): Meet with Aiden twice before exiting. You must give him a Painite Gem on one of those encounters.
Pain Mode (Lv2) (NowayArtemus): Entities deal +1 DiH damage every round you’re engaged with them and reduce your Sanity by 1 extra when you engage them.
Freeman had scrawled a small series of scribbles at the bottom of the Golden Stairway section, noting that while it could lead you back to the real world, sometimes it actually seemed to link to other places within the Backrooms itself, though he couldn’t be certain why. He guessed that the chaos of this place just had a way of messing with those who fell into it, like it consciously sought to disturb and horrify those unlucky enough to find themselves stuck, like yourself…
You investigated the notes a little more, finding a few more important clues: Freeman referenced a Loop of some kind. This place was an unnatural labyrinth made up of an unknown number of strange parallel levels, many of which could seem the same but also had their own distinct differences. These separate levels sometimes would look identical, but these were layers of the labyrinth that, like a lock, required multiple steps in a particular sequence to see actual success in your escape attempt. You didn’t understand this at all, so shaking your head, you continued.
There was an ominous note about a particular creature here as well known as the Faceling. In this level, Freeman noted he stumbled upon one of these entities that seemed to grow in power once it was defeated and rose to fight again. Therefore, it would need to be defeated twice before it would go down. However, the properties of this place meant even after being defeated twice, it may possibly resurrect and reappear in its more powerful form. This was what Freeman called the Loop. If the Loop ran out, it could return. It would be a desperate struggle to escape, both from the creature and from the Backrooms, but waiting around would you get nowhere.
Freeman also had a note about friendly entities known as Death Moths. These unusual butterflies were said to lead Wanderers to helpful items that could ensure one’s survival for longer, so you were keeping your eyes open for any of those.
[SPOILER] Once you Enter the Golden Stairs: [SPOILER]
Racing up those stairs, you sigh deeply. This was quite the adventure! To watch as the Frowner melted away into the shadows with a peaceful breath was something else. You were also shocked at how well the Dumb Gum worked. Popping it right into the mouth caused the entity to shudder for a moment and then go slack. Grateful to have been able to help out, you focus on Freeman as Aiden described him: an older man with round glasses and an almost blank expression on his face.
As the light from the Golden Stairs poured over you from the Painite Field, you could feel the air around you crackling with a focused energy. Aiden strongly implied that you should keep Freeman in mind, and hopefully, the Painite Field could act as a magnifying glass to use the chaos of the Backrooms to bring you two together. Freeman had apparently been aware of you dipping into the Backrooms through your dreams in the past and had mentioned to Aiden to keep an eye out for you in case you two should meet.
Aiden had told you that Freeman had connections within the Backrooms, and acted as almost a communication hub for all of those who Wandered through this place.
The luminescence around you suddenly gave way to a plunging darkness. Just as you started to feel yourself fall out of the blue, you were waking up with a start. The world was unfocused and there was a ringing in your ears. This hadn’t happened the last time you “woke up” in the Lecture Hall, but you barely had time to rub your eyes before a voice caught your attention.
“So, there you are. I’ve seen you around, Wanderer, and I’ve been waiting to meet you. I’m Freeman.” The world around you finally started to come into focus and before you stood a lean man with short white hair and round glasses.
Freeman. You couldn’t believe it, you’d somehow found him.
“I know you just got here, but would you do something for me? Would you help me find Lindy? Once I find her, I can help you, I think.”
It looks like, before Freeman could help you get home, you were going to have to put some work in. It could take a while… But with some luck and help from people like Freeman, you felt confident you could find your way.
Well! Looks like you’ve finally caught up with Freeman, Wanderer. And right away, he’s already got a quest for us to find Lindy and help her out. In the Backrooms, there’s simply never enough time, and things will never be safe enough, so journey on, Wanderer. Next week we will return with another chapter in the unfolding story of the Lobby Levels. Join us then and prepare for an adventure in the Den of the Hounds!
Also, just in case anyone missed it, the points you accrue each week from playing the weekly challenge and completing challenges will be updated weekly on our Weekly Challenge Leaderboard sheet located at:
https://docs.google.com/spreadsheets/d/1l-_i-DPpkW3H1tG1uZHhX39g6WHoQIa7IgoF3DcDg3M/edit?usp=drive_web&ouid=118020574277799616365
At the end of the Challenge Season, you may redeem your points for discounts and promo cards potentially!
Landing that last blow on that terrifying Ancient Faceling felt like a lightning strike of relief as it finally toppled over. You put a foot against its side, and with a grunt, flipped the monstrous entity over onto its back. You noticed an ethereal glow in the center of the Ancient Faceling’s chest.
You reached down, pushing aside the tattered layers of fabric to find a small circular amulet hiding within the folds. It was like a red, unblinking eye, beautiful and unnerving. What it took to get this thing… It caused an involuntary shiver to ripple through your spine.
You remembered reading about the Painite Gem that could be found when one of these entities was defeated. Perhaps you were unlucky, but the Painite never showed up when you took down any other Entities, only the Ancient Faceling. But the Painite… it was certainly something else. Just as Freeman’s report had described it, it gave off a strange red glow that throbbed like a heartbeat in the hazy darkness. In the notes, you’d noticed a handwritten scrawl that this may have been due to the dark force holding the gem having a kind of corrupting influence on it, causing its shine to dull immensely.
But once the gem had been freed, it would shine in a dazzling way that was hard to describe. The darkness, normally seeming to swarm around you, felt as though it was softening a bit, almost like the room had grown ten percent brighter. This thing had some power… you could feel it.
In a flash, you were back on the stairs, your head swimming with a million thoughts. You were exhausted, face soaked in sweat, ready to get back to real life and out of this dizzying, hellish maze. You brace yourself as you head up the stairs, but surprisingly feel yourself lighten with each passing step. As you near the top, the glow is so piercing that you are forced to squeeze your eyes tight and rush up. Finally, you push the door aside…
Then you come to… in the Lecture Hall.
What?
You blink, hardly believing it. You’re standing next to the podium again, looking out at the empty seats. You look down and notice a set of notes stashed in a small drawer on the podium. You scanned the front page: Freeman’s Report. Oh no… now you realize what Freeman meant when he said there was a loop. You’re in it.
You flip through the notes again, looking for anything you missed the first time through.
In the back of the book, you see a photograph of a young guy with a TV for a head called “Aiden”, and on the back of the photo were a few sentences. "Curious young entity, he wishes to free that creature of its bonds. Helping him may help us find the box. Also, must test out the gum. Entities seem to be growing stronger by the day." So, without any further leads, you steel your mind and brace yourself. It was time to find this Aiden. Perhaps he could lead you out of here or, better yet, help you find this Freeman so you could get answers. If anyone might know why you’d kept seeing this place for years on end in your hazy dreams, he might be it. With certain steps, you start on your journey. (edited)
[3:31 PM]
That was quite a journey! It looks like next week, you must find Aiden and help him in his quest, and hopefully find Freeman shortly after that. Prepare for the next leg of your adventure, Wanderers!
And like last season, complete as many challenges as you can in a single attempt, and record your journey by submitting your escape in the weekly-challenge-submissions thread for validation by our crew!
Epilogue
Well! Looks like you’ve finally caught up with Freeman, Wanderer. And right away, he’s already got a quest for us to find Lindy and help her out. In the Backrooms, there’s simply never enough time, and things will never be safe enough, so journey on, Wanderer. Next week we will return with another chapter in the unfolding story of the Lobby Levels. Join us then and prepare for an adventure in the Den of the Hounds!
Also, just in case anyone missed it, the points you accrue each week from playing the weekly challenge and completing challenges will be updated weekly on our Weekly Challenge Leaderboard sheet located at:
LINK HERE
At the end of the Challenge Season, you may redeem your points for discounts and promo cards potentially!
10-20 Points: 5% Discount
21-40 Points: 10% Discount
41-60 Points: 20% Discount
61-84 Points: Vaulted Promo and 20% Discount
85+ Points: Mystery Prize and Vaulted Promo and 30% Discount
Collapsible content
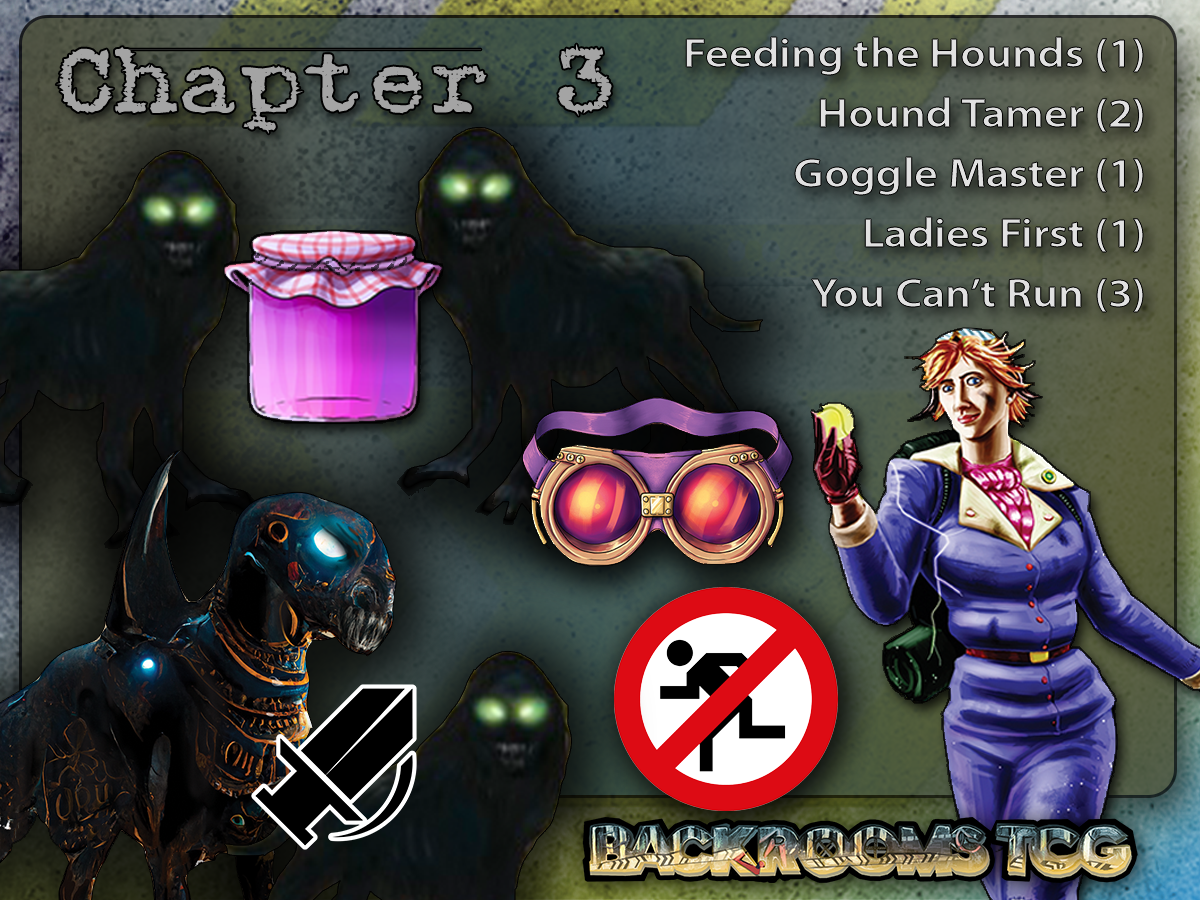
Entry 3.0
Week Three
“Yes, hello, I know you probably have many questions, but I do need to ask for your help in this case. I’ve seen how capable you are. You’re not just any Wanderer who’s no-clipped into this place.” Freeman adjusted his slightly crooked glasses. He was energetic and charismatic, though his form would seem to suggest he would have been frail and lanky.
“No-clipped… so that’s real then? I thought it was all just a dream before, but then when I saw all the stuff about the Backrooms on the internet…” He stopped you there.
“Yes! This whole no-clipping business is very real. Some of those you’ll meet here were born here, and others, like you and I, came from the outside world. By some accident or providence, we’ve found ourselves gathered together. In this place, things can be very opposite to what you know of the real world, but I guess you kind of know that, don’t you?” His eyes told you he already had some idea of your previous experiences in this place.
“It’s all real then. I really fell into- I mean, no-clipped into this place before…” You felt a little dizzy at the realization of all this. You had been here before but in some weird and special way… You wondered what it meant.
“Yes, but you only came through with your astral body. I’ve never met anyone who could do that. The rest of us have come through by more “conventional” means, though none of this is normal. But there’s something unique about you. I have many eyes and ears throughout this place, and in all my time, no one has been able to do what you have. So I have to ask, will you do it? Will you help me find Lindy? And then we can talk about our next steps.”
“Will I get to go home?” You felt grimy, sweat caking your shirt to your chest. A shower would be the ultimate escape.
“It might take some time, but yes, I fully intend to get you home. First, we deal with our immediate problems, and then we figure out how to get to the happy ending. Deal?”
Freeman held his hand out, and you shook it without much trepidation. He laid out the plan before you then: Lindy had been on a mission for him to find the “Master Goggles”, which was a highly advanced piece of tech that he’d been dying to test out. It was located in a very protected section of this level, which he called the Lobby Level. There were many levels to this place, he’d explained, and on the initial Lobby Levels, he had the most knowledge and access.
The problem was that all the smarts in the world couldn’t help outrun the menagerie of terrifying Hounds guarding the Goggles. The goal was to distract these fiendish dogs and find Lindy. Get the Goggles, then escape! Once you two headed up the stairs, by keeping Freeman in mind, he theorized you could find him again, the same way as you had just done.
With the plan set, you headed out of Freeman’s office and back into the Lobby Levels to find Lindy.
Chapter Three: In The Den of the Hounds
Required: Ancient Hound (1 Min), Hound (2 Min), Master Goggles (1 Max), Death Moth Jelly (2 Max)
Set-up: Standard Setup
Goal: Help Lady Lindy recover the Master Goggles from the lair of the Hounds, but beware! The entities are well aware of your presence and will hunt you down. You must both distract your enemies and take them down, depending on the situation. Take heed and prepare yourself, Wanderer!
Challenges:
<:DeathMothJelly:1204613611469938858> Feeding the Hounds (Lv1) [NowayArtemus]: Distract 2 Hounds before escaping.
<:attack:1180695338215030795> Hound Tamer (Lv2) [NowayArtemus]: Defeat both a Hound and an Ancient Hound before escaping.
<:MasterGoggles:1098047518257983489> Goggle Master (Lv1) [NowayArtemus]: You must have the Master Goggles in your Inventory when you escape.
<:nextlevel:1088983954377429062> Ladies First (Lv1) [NowayArtemus]: You must have Lady Lindy as your Companion when you escape.
<:unfriendly:1171270406666199040> You Can’t Run (Lv3) [HassThrift]: If any entities are present on the Field at the start of the Action round and you aren’t engaged, you must engage or distract one if possible. You must always be engaged with an entity if you can.
[SPOILER] Once you Enter the Golden Stairs: [SPOILER]
You and Lindy scrambled towards the stairs with the energy and urgency that comes with having Hounds nipping at your heels. They had certainly gotten a bite in here or there, but overall, you two were safe and sound. As the warm Painite Field energy rippled in the air around you, you finally started to catch your breath as you took the steps up. Lots of close calls, but not close enough to keep you down. You gripped the goggles hanging around your neck, knowing that soon, you and Lindy would find Freeman and the nightmare would be one step closer to being behind you.
You kept Freeman in mind as you closed in on the threshold. Inadvertently you felt your eyes slam shut as you entered the passageway, and then the brightness again turned to darkness. You opened your eyes, the darkness giving way again to a swarm of light that hurt your head. You shook the cloudiness in your head away in time to hear Freeman’s voice break through to you and you were again back in his office. It was surreal how you could find yourself teleported back here after just wading through vicious creatures and the foreboding atmosphere.
“Ah, there you are! Looks like it took you some time to wake up, otherwise you might have caught Lindy before she headed out. Always more to do, you understand, but she gives her congrats to you for making it through. And I see you managed to bring those marvelous Goggles back with you! Amazing how useful a good piece of tech can be in this place.” Freeman seemed pleased, his hand held out to you to help you up. “Lindy said you did very well out there. I know she’s got quite a lot of experience out in the Field, but I was glad to send you. Like I thought, your data doesn’t lie. You’re practically a natural! I’ve worked with a number of you Wanderers in the past, and I-” A loud crackle rang out, causing both of you to jump. You noticed a radio sitting on a nearby countertop, and a crackling voice then began to break through.
“Help m– crackle -trapped and alo- crackle -me Tomac- crackle -unnatural strength and I don’t know if I can- crackle-” The radio crackled one last time before the sound turned into nothing but fuzzy static. Freeman looked shocked.
“Oh no, Tomac!” Freeman cupped his mouth briefly as he thought of what to do. Finally, he turned to you. “Sorry to say but it appears we have to take a side detour. That was Cosmonaut Tomac, a very good associate of mine. He’s a good man, but this place has a strange corrupting influence on many of those who enter here as we have. I’ve seen firsthand how some of these poor Wanderers have their souls darkened until they have been twisted into an unnatural servant of this abyss. I’m sorry to say it, but I will ask you again for your help. Please go find Tomac and bring him back here to me. He is quite special!”
Epilogue
Oh oh! Looks like Tomac is in trouble! Time to go help him out next week. As always, time in the Backrooms is a tricky thing, especially when you’ve got so much do to. So journey on, Wanderer! Next week we will return with another chapter in the unfolding story of the Lobby Levels. Join us then and prepare for the newest encounters with Monsters and Wanderers!
Also, just in case anyone missed it, the points you accrue each week from playing the weekly challenge and completing challenges will be updated weekly on our Weekly Challenge Leaderboard sheet located at:
LINK HERE
At the end of the Challenge Season, you may redeem your points for discounts and promo cards potentially!
10-20 Points: 5% Discount
21-40 Points: 10% Discount
41-60 Points: 20% Discount
61-84 Points: Vaulted Promo and 20% Discount
85+ Points: Mystery Prize and Vaulted Promo and 30% Discount
See you next week and keep on running!
Collapsible content
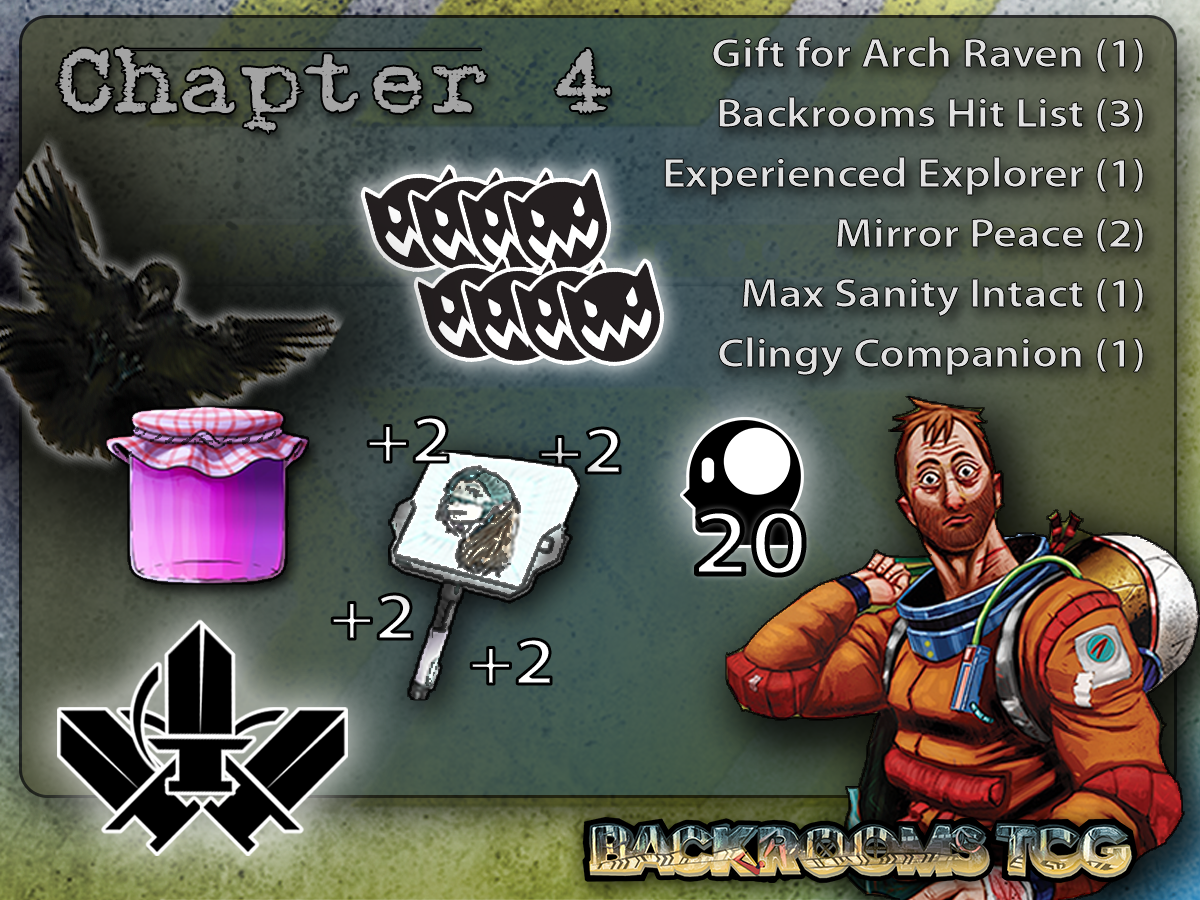
Entry 4.0
The radio crackle had added a new sense of tension and urgency to the situation. Tomac sounded like he was in some bad trouble wherever he was. Freeman looked alarmed, but his face relaxed a bit as he mastered himself and came out the other side looking more calm. He waited patiently as you pondered this new task. This Tomac guy was in trouble, and how could you stand by and not try to do something?
You agreed to help with just a slight hint of hesitation. Freeman was very grateful and clued you into some more of what had been going on in the Lobby Levels lately. It seemed as though there’d been a wave of hyper-aggressive entities roaming about, and Freeman worried that Tomac may have been caught up in it. He warned you that somebody would find you to help lead you to Tomac. From there, you would then need to bring him back. Freeman had tons of ears out there, so you’d surely find somebody who could help.
“While you’re out there, I do need to ask you to do a few other things as well. I only ask because I know you’re very capable and this research is extremely important in our battle against the master of these Lobby Levels, the Conductor. Help me with this research, and I will help you get home, I promise.”
Handing you a carefully folded paper, he took your other hand and shook it with a resolved expression on his face. “I know you can do this! You’re not just any Wanderer, remember that. You have a connection I don’t quite understand, but I can sense that you will play an integral part in our mission here. If you can do these things for me, it will greatly up our chances of making it through this thing and getting you back to where you belong, Wanderer. Find a friend and find Tomac, then bring him back, ok? Take care out there.”
With no time to waste, you rushed out of the office and into the desolate Lobby Level.
Chapter Four: Monsters and Wanderers
Required: Cosmonaut Tomac (1 Max), Arch Raven (1 Max), At least 3 Unique Attack items, Mirror Piece (2 Max), Death Moth Jelly (2 Max)
Set-up: Standard Setup
Goal: Find Tomac in the Lobby Levels and bring him to safety through the Golden Stairs. Complete a few important research tasks for Freeman while you’re at it, and finally leave with full Sanity.
Challenges:
Gift for Arch Raven (Lv1): Gift the Arch Raven a Death Moth Jelly.
Backrooms Hit List (Lv3): Defeat 4, 6, or 8 different unique entities before exiting. 4 entities are worth 1 Point, 6 entities are worth 2 points, and 8 entities are worth 3 points. Use a die or tokens to track each time you defeat a unique entity.
Experienced Explorer (Lv1): You must use 3 unique Attack items before exiting.
Mirror Peace (Lv2): Deal at least 8 damage using the Mirror Piece.
Max Sanity Intact (Lv1): You must have 20 Sanity when you move into Golden Stairs.
Clingy Companion (Lv1): Cosmonaut Tomac must be the second companion you gain. Once Tomac is your Companion, you may not discard him for another companion or lose him by any card effects. He is permanent.
[SPOILER] Once you Enter the Golden Stairs: [SPOILER]
You and Tomac run up the stairs, the familiar warm haze filling the space around you. There was a bright Flash then total darkness, and then a cool breeze brushed against your face. Your eyes flutter open, and you spot Tomac sitting on a chair nearby. Freeman offers you his hand which you take and return to your feet.
“Ah, excellent work! I heard about your adventure out there. I know I asked quite a lot, but I promise it's all very essential. The results are speaking for themselves, and soon I think we’ll be ready.” He held a binder of papers, flipping through them at what looked to be mounds of data. “There’s still work to do, but I’m on the verge of finding a secret pathway to an entirely new place. I have some vague reports of a portal of some kind, but we haven’t been successful in locating it yet. But Tomac here has a special gift. In the past, we’ve discovered that he can sense these sorts of “rifts” to other places. The rifts have all been very small though, more akin to windows than doors. We can look, but passage hasn’t been possible yet.” He shakes his head slowly, obviously a bit perturbed about the whole thing.
“So where do we go from here then?” You can’t help but wonder where this is all going. How can you possibly help with these rifts?
“Well, my friend, let me tell you what I propose: Find the Clocksmith.” You raise an eyebrow and he laughs gently. “I know, another odd request. But this is an ancient being we’re talking about. He’s an enigma, but as far as we can tell, he’s not necessarily dangerous or malevolent. But he will mess with your mind a bit, just to warn you. It’s in his nature. Think of him like a sage. I can’t say what he’ll ask of you, but whatever it is, do it. If you do, I believe we will finally have the power we need to blow this rift issue wide open.”
“Find the Clocksmith. Got it. I’ll see what I can do.” Hopefully, this Clocksmith character wouldn’t demand too much, but if that was what it took, you were willing to make it happen.
Epilogue
Well, looks like it's time to get up close and personal with the Clocksmith! He is quite the mysterious gentlemen, so next week, it'll be time to search him out, and perhaps gain some knowledge for the future... So journey on, Wanderer! Next week we will return with another chapter in the unfolding story of the Lobby Levels. Join us then and prepare for the to hear about the Quest of the Clocksmith!
Also, just in case anyone missed it, the points you accrue each week from playing the weekly challenge and completing challenges will be updated weekly on our Weekly Challenge Leaderboard sheet located at:
LINK HERE
At the end of the Challenge Season, you may redeem your points for discounts and promo cards potentially!
10-20 Points: 5% Discount
21-40 Points: 10% Discount
41-60 Points: 20% Discount
61-84 Points: Vaulted Promo and 20% Discount
85+ Points: Mystery Prize and Vaulted Promo and 30% Discount
Collapsible content
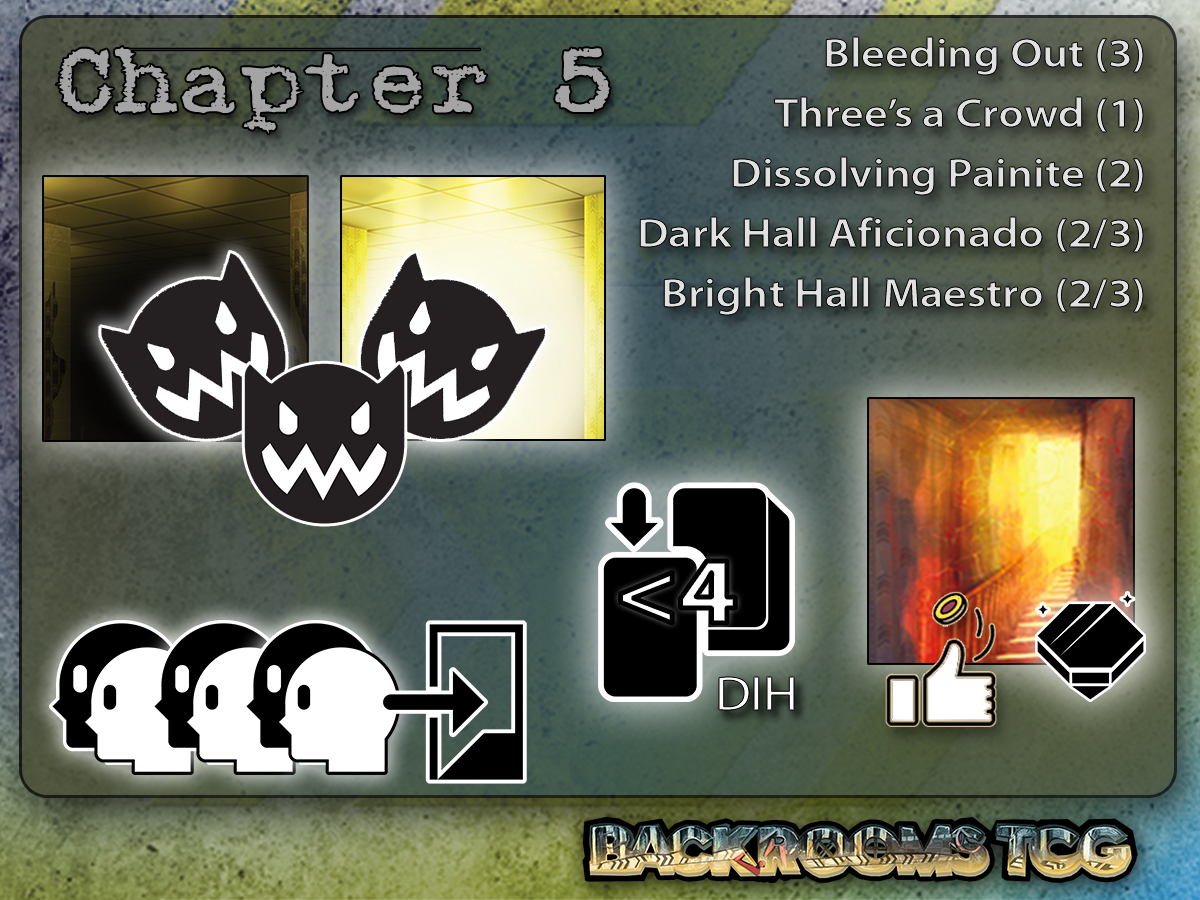
Entry 5.0
As you ventured out of Freeman’s office, you wondered what the Clocksmith would be like. It sounded like he had some kind of supernatural powers, but you also found it curious that Freeman would emphasize how he didn’t seem dangerous. As you wandered around, passing dark halls and shadowy corners, you realized you weren’t alone. Eyes bored into the back of your head with an almost physical presence. You wheeled around and in a clearing maybe 20 feet away, you noticed a bald man impressively dressed in an almost military-looking jacket. You stepped towards him cautiously, almost ready to speak when he stopped you.
“You are correct. I am he.” The Clocksmith didn’t seem to move his lips, but his voice felt like it was all around you. No doubt about it, you were in the right place.
“Freeman sent m-” He waved his hand nonchalantly, and an invisible force seemed to compel you to hold your tongue. He didn’t need your explanation. He already knew what you were here for.
“You are to go on a quest. You must meet the three who wait for you. You must also master the Shadow and the Light. Overcome these forces of nature, but beware of the illusions you will be up against. Take this Watch with you. You must drain yourself dry in this quest, wring out every illusion and instinct, and master those who would think themselves your master.” The Clocksmith dropped an old bronze watch into your hand. It was warm to the touch, almost like it held some kind of life within. You couldn’t take your eyes off of it, but once you finally looked back up, you realized you were entirely alone.
“Master the shadow and light? The three who wait? And how do I drain myself dry?” You’re left with so many questions.
You turn the watch over, examining it again but soaking in more of the details. It was elaborately sculpted with lots of tiny embellishments and precise etchings. Your finger caught on the edge and suddenly the face of the watch popped open. Inside was a small glowing orb, and without thinking, you rubbed your thumb against it. Instantly, many images flashed through your mind, and everything the Clocksmith said became clear to you.
Now, you’re ready to go. The quest was on!
Chapter Five: Quest of the Clocksmith
Required: Bright Hall (3 Min), 3 Unique Companions, Dark Hall (3 Min)
Set-up: Standard Setup
Goal: Go on a quest to meet 3 unique companions, defeat 2/3 Entities in a Dark Hall, defeat 2/3 entities in a Bright Hall, and exit the Lobby Levels with 4 cards in your DiH or less. If you reveal the Golden Stairs and have the Painite Gem, flip to see if you lose your gem.
Challenges:
Dark Hall Aficionado (Lv2/3): Defeat 2 Entities while in a Dark Hall for 2 points, or defeat 3 Entities while in a Dark Hall for 3 Points.
Bright Hall Maestro (Lv2/3): Defeat 2 Entities while in a Bright Hall for 2 points, or defeat 3 Entities while in a Bright Hall for 3 Points.
Bleeding Out (Lv3): Escape the Backrooms with 4 DiH or less.
Three’s a Crowd (Lv1): Have 3 different companions before escaping.
Dissolving Painite (Lv2): If you have a Painite Gem when you reveal the Golden Stairs from your Deck in Hand onto the Field of Play, flip your gem. If it lands Compass Side up, you lose it
[SPOILER] Once you Enter the Golden Stairs: [SPOILER]
As you passed through the threshold at the top of the Golden stairs, in the flash of bright light that you’d come to expect, you saw his face: The Clocksmith. Then, without warning, you were seated at a table across from him. His eyes were drenched in shadows, but you felt at ease despite the darkness swirling around you two. Without saying a word, he motioned towards you.
The memories of your journey whirled through your mind: many new and old faces ran past you, the ones you’d seen on this trip and the ones you’d seen in your many trips from before. The strange challenges you’d overcome, the terrifying entities that shocked and horrified you, the blinding hallways and terrible darkness, and the curious items stowed around every other corner… So much had happened, and you felt as though home were farther away than ever before. This journey had been taxing for sure. Your heart was pounding so loudly that you thought you might have a heart attack.
“This quest is done. Home… it’s close.” His voice, like the sound of rain pelting against a stone roof, completely quieted the anxious thoughts that had been bouncing around inside your head. You felt the warmth of a supernatural reassurance flowing through your mind. “You… are not far now. Find the Car Park. Freeman will know.”
Despite the whole situation, you strangely felt at ease. In the Lobby Level, the Clocksmith’s presence was unnerving, but in this strange shadowy realm, you felt like you could see the picture beginning to come together. Maybe home wasn’t so far away after all? You shook your head, realizing you’d been zoning out, deep into your thoughts.
“Sorry, you said something about a Car Park?”
Turning to the Clocksmith, you noticed that he’d vanished. Looking around with alarm, you see the darkness around you closing in quickly, shadows nipping at your toes.
“Hey there, are you ok?” At the sound of Freeman’s voice, your eyes popped open. There you were, waking up in your usual place on the floor of Freeman’s office. Was it a dream? You nodded your head, a sign of life at last. “You’ve been out a while since you got back. Probably a few hours now. Had us worried a bit, but your vitals seem good. Figured maybe you needed some extra sleep. Things can get intense with the Clocksmith.”
“No kidding.” You shook your head, rubbing at your eyes to clear the gunk.
“So, what did he say?” Freeman licks his lips, his eyes nervously searching your face.
“He said, “Home isn’t far away now. Oh and Car Park, he mentioned some kind of Car Park. Said you would know.”
“Car Park, oh yes, I think this confirms my research. The Conductor has a web spun around this whole place, but I have my connections as well. I knew he’d been working on something important, but I couldn’t be certain. But the Clocksmith has powers that even the Conductor doesn’t understand. Clocksmith is a prophet in some ways. Even I’m not certain of the extent of it, but I do know that the Clocksmith can see things others can’t. I think he sees it in you, Wanderer. He sees your vast potential to create a pathway through this maze where others may falter and perish!” Freeman’s face shined with certainty and determination. You could feel the energy crackling in the air.
“So what’s the plan then?” You were surprised at how excited you felt, but also nervous about what would come next.
“We’re breaking into the Car Park. But to do it, we’re going to need a big distraction. And I know just what to do. Listen up, and follow my lead. Let’s get you home soon!” Freeman smiled, and you couldn’t help smiling too. It sounded like things were about to get spicy.
Epilogue
Oh my! Sounds like there’s only one path ahead of us, Wanderers, and that’s to get into the Car Park! Freeman has a plan, but before anything else can happen, we must find a way to create a big distraction. Join us next week as we explore Freeman’s plan and see just how spicy things get!
See you next week, Wanderer, for the beginning of the Chaos Game!
Collapsible content
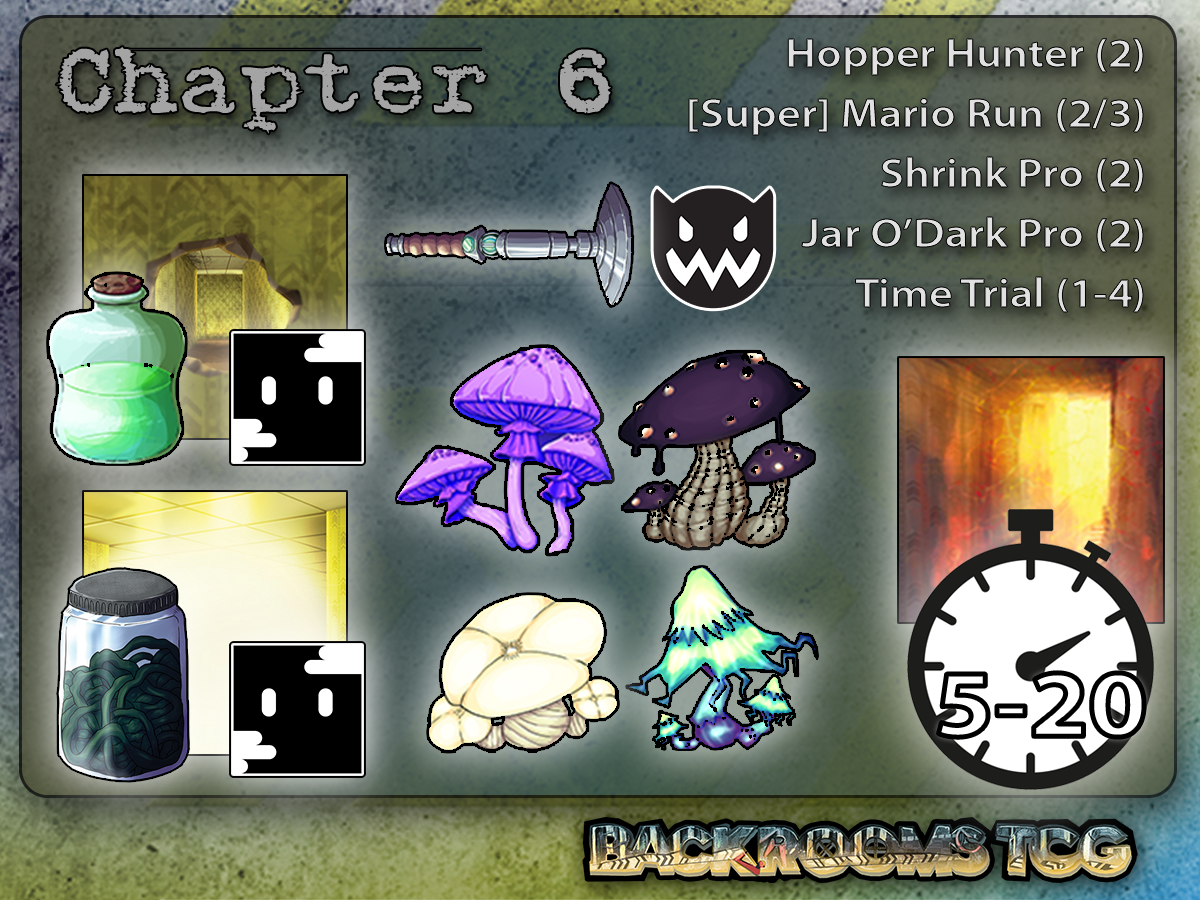
Entry 6.0
Last week, we were sent on a quest by the Clocksmith himself to undergo a series of trials, and in the end, we met many unique friends and were tasked with mastering the dark and the bright halls. In the end, things worked out ok and we got back to Freeman, just in time to go on another mission! This time, we’re tasked with some interesting things to do out in the Lobby Levels, so we hope you are prepared for another week of mighty challenges to overcome!
Read on to uncover the next chapter in our exciting story!
Like last season, complete as many challenges as you can in a single attempt, and record your journey by submitting your escape in the weekly-challenge-submissions thread for validation by our crew!
Chapter Six
Freeman, sensing that pivotal events are about to reach their climax, has tasked you with completing a series of missions. He shows you the list, and looking over it, you groan in anticipation. Gathering Shrooms, using a bunch of items, and dealing with Bright Halls and Punctured Walls. And on a timer, too? It all seemed kind of random… How was this going to help?
“I know this almost seems like grunt work, but the Backrooms isn’t just any place. You can think of this liminal space as a subconscious layer of reality, pretty much. It responds to chaos and chaotic things, and these objectives are my way to test out a theory I have brewing. I think if we can cause enough of a stir out there, we can elicit a powerful reaction from the forces that seem to harmonize with this chaos. Maybe we can get things into the right position, align all the stars so to speak, and find the path that will let us break through to the Car Park. Of course, this won’t be easy. I presume the Conductor’s forces may be appearing soon, but for now, we need you to get the ball rolling. Stay safe, and don’t die on us.”
You nod, feeling the pressure building as he hands you a small bronze stopwatch on a chain. You know that everything you've experienced so far has led you to this moment, this long and wearisome struggle against the dark forces, so you try to shake the feeling off. If you can stir things up enough, you figured you’d be taking on the Conductor himself soon enough. You could do this! You take the list Freeman hands you, folding it up and slipping it into your pocket. Finally, you click on the button of the stopwatch to start it before heading out of the office and into the darkness of the Backrooms. There’s no turning back now.
Chapter Six: The Chaos Game
Required: Hopper Device (2 Max), 4 Unique Shroom Items, Shrink Drink (1 Min), Jar O’Dark (1 Min, 3 Max), Punctured Wall (1 Min)
Set-up: Standard Setup
Goal: Complete a list of objectives from Freeman:
Use the Hopper Device to send an entity into a Portal card, Use the Jar O’Dark twice, once as a concealment item and once to get CCS from a Bright Hall, Use the Shrink Drink twice, once as a concealment item and once to enter a Punctured Wall, and escape with 4 unique Shroom items in your Inventory. You also must attempt this as quickly as you can!
Challenges:
Hopper Hunter (Lv2): Send an Entity to the Discard Pile using the Hopper Device. The Entity must be sent through a Portal card.
Mario Run/Super Mario Run (Lv2/3): You must have 3 or 4 different types of Shrooms in your Inventory before escaping the Backrooms. 3 Shrooms is worth 2 points, and 4 Shrooms is worth 3 points.
Shrink Pro (Lv2): Use Shrink Drink twice, once as a concealment item and once to enter a Punctured Wall.
Jar O’Dark Pro (Lv2): Use Jar O’Dark twice, once as a concealment item and once to gain CCS from a Bright Hall.
Time Trial (Lv1-4): Time your run. Complete your escape within 5, 10, 15, or 20 minutes. 5 Minutes or less is 4 points, 10 is 3 Points, 15 is 2 Points, and 20 minutes is 1 Point.
[SPOILER] Once you Enter the Golden Stairs: [SPOILER]
You rush up the Golden Stairs, your heart beating wildly in your chest. You wake up almost instantly, it feels like. Freeman is kneeling in front of you, bracing your shoulders with his hands as if you might rocket out of his grip. He looks somewhat concerned but also has an immense smile on his face.
“You did it, Wanderer! What happened out there was enough to get their attention. I can feel it! No, don’t worry about the watch. You hold onto that. The important thing is that things are shifting now. The Backrooms always has this auditory fuzz to it when I listen in on what’s happening, but there’s a hum now, an elongated noise that tells me something is coming. Someone heard what we did here. Something big.”
You audibly gulp. Ooh, that sounds kind of terrifying.
“I know, it’s unsettling. But it’s MOVEMENT. We’ve got someone’s attention! That’s the point. Things are going to get crazier for sure, but we can do this, Wanderer. I’m sure of it. We are very close, so we can’t falter now. We need to meet the Conductor at his level, and the best way to do it is to get him down to ours first. Make him come out. The first step is done now, and the second step will be here before you know it. Are you ready? Because She is.”
“She? Who do you mean?” You glance around in puzzlement until Freeman points to a monitor nearby. You squint at the display until you notice a lanky silhouette passing through a Hallway. Was that… a woman in a sharp red suit?
“That’s our biggest obstacle right now. That’s the Scarlett Knight.”
“Scarlett Knight?” You feel a familiar dread rising in your chest. This one sounded a bit different than any of the other entities you’d encountered so far. Even just the video footage of her on the monitor puts knots in your stomach.
“She’s the Conductor’s Lapdog, as it were, his top general. Used to be Crimson, but something happened a long time ago, and now it’s her. Needless to say, she’s going to be a real challenge. Are you ready, Wanderer?”
All you could do was nod.
“Let’s do it. What’s the plan?”
Here it was, the boss before the final boss. Time to do or die!
Epilogue
Looks like it’s finally time to tackle one of the Conductor’s Biggest Baddies herself, the Scarlett Knight! This isn’t going to be easy, Wanderers, but surely you’re up to the task! The Car Park is closer than ever, but it won’t be an easy path to tread. Freeman is confident this is the right path, so let’s go with his ideas and see what happens! Join us next week for another wild chapter in this escalating adventure.
See you next week, Wanderer, as we work to Summon the Scartlett!
Keep on Running!
Collapsible content
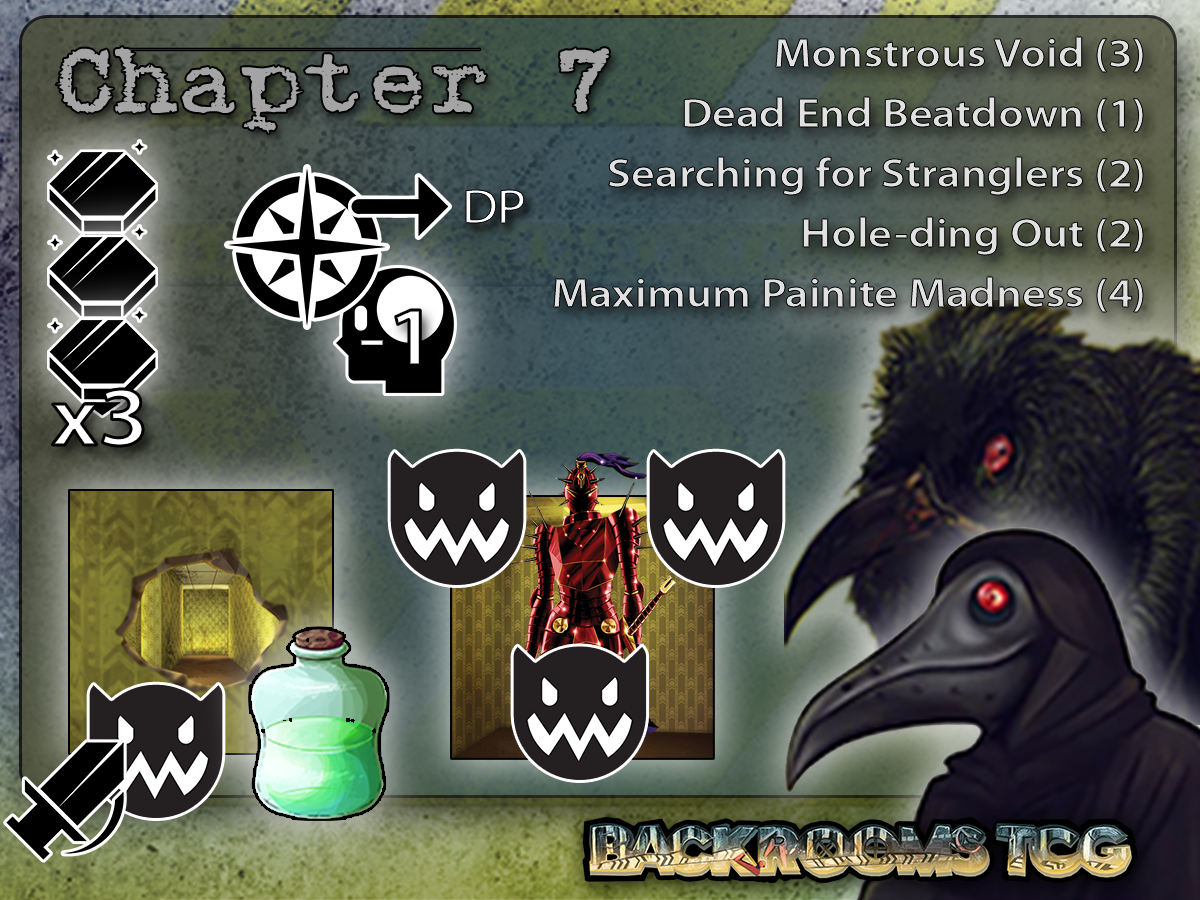
Entry 7.0
Chapter Seven
“So, Scarlett Knight, huh? Who is she?” Freeman waves you over to his desk, where a folder sits in view.
“Have a look, Wanderer. I’ve got a file on her. She’s a powerful force here in the Backrooms, doing the Conductor’s dirty work. She’s nothing to scoff at for sure, but if we’re going to get you home, we’ve got to go through the Conductor, which means going through his precious Knight first.”
Freeman fills you in on the particulars of this latest mission. You would need to perform another “ritual of chaos!”, as he called it. If the chaotic elements all lined up, it might reveal a path to take her out.
“Yes, you’re going to need to get your hands dirty, I’m sorry to say. There’s no avoiding this, we must take out some of her hench-entities if we’re going to be able to get her out into the open! Find them and take them out, then I’m sure she’ll come out to put a stop to it. Oh and, you’ll need to get through the Punctured Wall again. Find some Shrink Drink while you’re in there and get through that hole! You can’t escape until you do. Ah, and don’t forget the Painite Gems!”
He explains that you’ll need three of them before you come back.
“Three? Oh boy, this is going to take some time…” You sigh but Freeman pats you on the shoulder.
“Yes, we need the energy if we’re going to get the Conductor out into the open. We need him vulnerable, and if he’s clouded by the loss of his closest General and the rising star of his old compatriot Crimson, oh I think he’ll be somewhat preoccupied. That’s when we strike! But first, we’ve got to deal with Scarlett, and to do that, we’ve also got to take out her little bodyguards. The Strangler brothers.”
You gulp. They don’t sound very pleasant.
“Don’t worry, Wanderer! One step at a time. And the first step is to get out there. Oh and be careful. It feels like there’s a dark wind coming. You might notice it as you’re traveling, but the air seems extra heavy and draining. Guard yourself.”
You nod, knowing there is no other way. Freeman pats you on the back, and you quickly walk back out into the Backrooms once again. The only path forward was right in front of you, so it was time to get on with it.
Chapter Seven: Summoning The Scarlett
Required: Scarlett Knight (1 Max), Shrink Drink (1 Min), Dead End (3 Min), Strangler (1 Max), Ancient Strangler (1 Max), Shrink Drink (1 Min), Punctured Wall (1 Max)
Set-up: Set the Scarlett Knight out of play at the start of the game.
Goal: Scarlett Knight must be summoned, but the process will be intense. First, you must defeat three entities at a Dead End. Scarlett Knight will only appear once that’s completed. You’ll also need to gain 3 Painite gems, and travel through a Punctured Wall after defeating an entity, all to create the chaos necessary to bring forth the Conductor and eventually reveal the pathway to the Car Park! Oh and don’t forget to take out the Strangler and Ancient Strangler as well.
Special Rules:
After defeating 3 Entities while at a Dead End, the next time you Deck Out, shuffle the Scarlett Knight into the Pull Pile after placing cards out for the no-clip round.
Challenges:
Chapter Seven Challenges:
Monstrous Void (Lv 3): Navigation Points placed onto an Unfriendly Entity or a Permanent Fixture go into the Discard Pile. In addition, for each card you discard in this way, lose 1 Sanity.
Dead End Beatdown (Lv 1): Defeat 3 Entities while at a Dead End. Once you do this, the next time you deck out, shuffle the Scarlett Knight into the Pull Pile before placing cards out for the no-clip round.
Searching for Stranglers (Lv 2): Defeat both a Strangler and an Ancient Strangler before escaping.
Hole-ding Out (Lv 2): Defeat an entity, then use Shrink Drink to go through a Punctured Wall. Moving through the Punctured Wall must happen the next movement round after defeating the entity.
Maximum Painite Madness (Lv 4): You must loot three Painite Gems. Upon defeat, these Entities each occupy an Inventory slot.
[SPOILER] Once you Enter the Golden Stairs: [SPOILER]
You trudge up the foot of the stairs, forcing one step after the other in front of you. The Painites were heavy in your pockets, but you’d made it. In a moment, you’d be back in Freeman’s office, ready to take a moment to breathe and drink some Almond Water. Maybe you’d even see Aiden or Lindy again. It felt like it had been a while, though your sense of time in this bizarre realm was almost nonexistent. The minutes and hours could blur together, or was that just the Backrooms affecting your mind? You couldn’t be sure anymore, but Freeman seemed so hopeful that it would be done soon.
Suddenly, the Exit that was always at the top of the Stairs vanished in front of you, just as you went to push your way through. The stairs led into a wall now, like you’d suddenly been transported to the Winchester House. What in the world was going on? What the hell happened to the Stairs? What about Freeman? No, this couldn’t be happening. You headed back down the stairs, feeling an anxiety rise in your throat. Maybe the Golden Stairs had been teleported elsewhere in the Lobby Level. You’d encountered the whole place reshuffling itself around now and then, so it couldn’t be an impossibility… But this felt different.
The end of each loop and the beginning of the next had always centered around the blackout. Everything went dark and then it was as though you were suddenly waking up from a daydream. It almost felt like the whole world blinked for a moment, just a second.
crackle -anderer, Wande- crackle
You jump, alerted to a strange voice coming out of your back pocket. You gasp as you pull out the stopwatch you got from Freeman. A voice was coming from it!
“Hello? Freeman?”
crackle Ah! There you are! I almost forgot about this little radio transmitter I put into the watch. I meant to tell you about it before. That’s why I told you to hold onto it crackle
“The Stairs vanished on me! I was almost back to your office!” You wondered what would have happened if you’d been partway through the Stairs when it had disappeared. You could imagine that nothing pleasant would be the answer though…
crackle Yes, sorry to say that the Portal closed down. The Conductor appears to have severed the connection temporarily, but we can’t let it stop us. We’re so close, and we’ve got his attention. Now, we might have a chance!
crackle
Even though you felt a million miles away from Freeman, somehow, his confidence was infectious. Maybe things would be ok!
“Ok, I’m ready. What do we do now?” You clutched the little radio watch close to your ears, waiting to hear the next steps.
This was going to get crazy… you could feel it.
Epilogue
The final hour is upon us Wanderer! The biggest bad in the whole of the Lobby Levels will arrive soon, and we hope you’re up for the challenge! This won’t be easy by any stretch, and will require immense cunning and skill to navigate the most treacherous waters of this liminal space we all exist in.
The Car Park is near, Wanderer. Can you make it in?
See you next week, Wanderer, for the beginning of the end in the Battle for the Backrooms!
Keep on Running!
Collapsible content
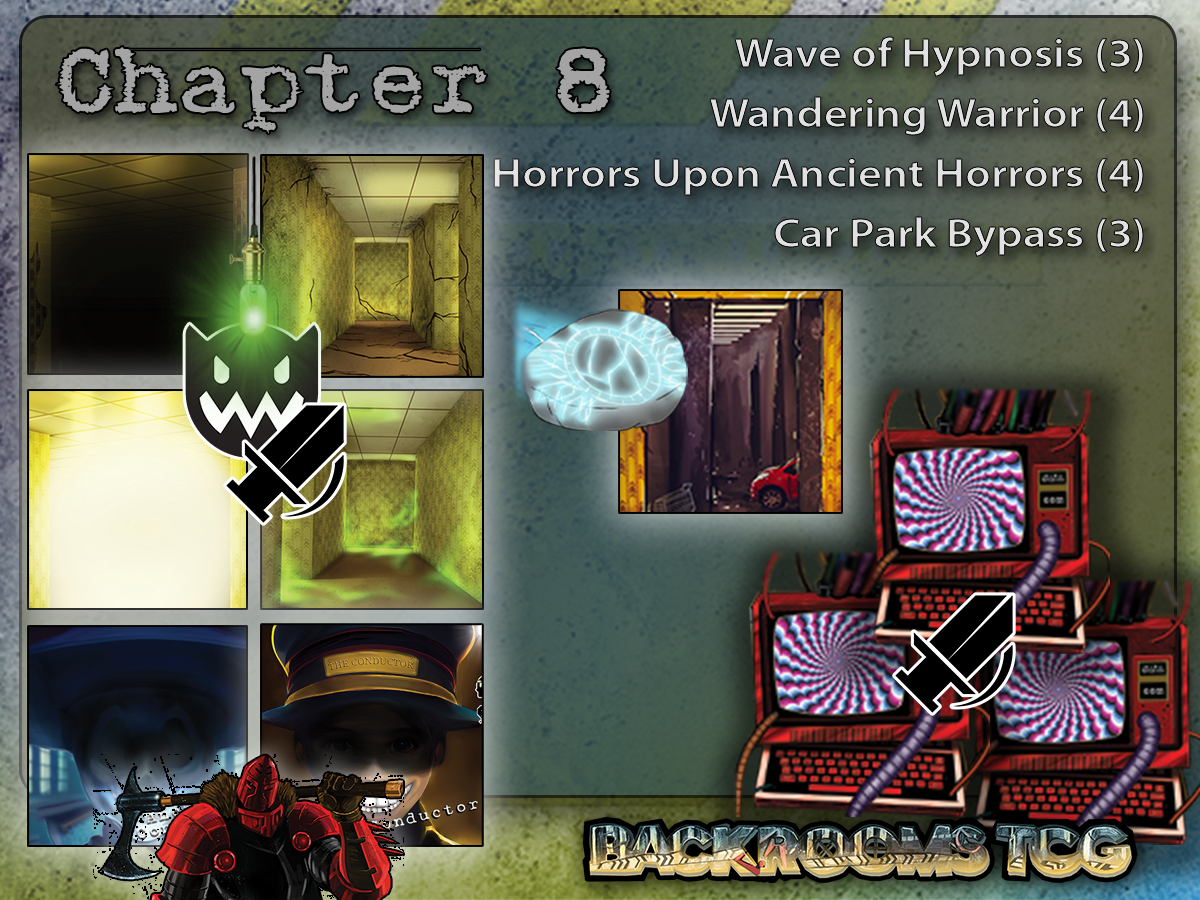
Entry 8.0
“Ok, I’m ready. What do we do now?” You were unnerved by the Golden Stairs vanishing so abruptly, but Freeman seemed certain that you were closer to your goal than ever before. You took deep breaths, preparing yourself for what lay ahead.
crackle Great to hear! Yes, this is not going to be easy, but this is an endless liminal space we exist in, so of course it was never going to be a walk in the park! Well, first of all, we need to eliminate the Conductor’s watchful eyes down here. Since we knocked the Scarlett Knight out for the moment, we’re now going to need to deal with the Monitors. You’ve probably seen them around, big computer monitor entities that can suck you in with their hypnotic gaze. You’ll need to take all three out. crackle
Freeman told you that once those three had been taken out, the Conductor would come out to get a closer look at the situation, and that’s when you would finally be able to strike. But it wouldn’t be as easy as just taking him out, as he was an Ancient being and would likely tap into those ancient roots when push came to shove.
“Ok, take out the Monitors, and then we can nail the Conductor. Got it.”
crackle Yes! But you’ll need to find Crimson, he’s the only one with the power to knock the bring out the Conductor’s truest form. crackle
Truest form? Uh oh, the Conductor himself wasn’t enough? You felt your stomach knot up a bit at the thought.
crackle Yes, I know what you’re thinking, but the only way I think we’ll be able to navigate to the Car Park is by bringing out that true form. Then, you and Crimson can tackle that final monstrous version and lay him to the ground. I suspect when that happens, it’ll send a ripple through this place that’ll open up the pathway to let us get to the Car Park. We need that powerful surge of energy before it will though, so be prepared for anything.crackle
“Ok, I’ll find Crimson, and we’ll get to that Car Park Portal!”
crackle Excellent! Oh and one more thing. You’ll need to find the Skip Rock as well because it’s the only way you’ll be able to successfully navigate your way into the Portal to the Car Park. crackle
“Ok, got it. What about you? How will you get into the Car Park? Are you meeting us there?”
crackle Sorry, Wanderer, I wish I could, but I need to stay here. I’ll send someone to meet you at the Portal though, so keep your eyes open! Now go, Wanderer, there’s no time to waste. Once you get to the Car Park, I believe you’ll be able to get home through there. crackle
Home. It sounded so far away just then. Could the Car Park end up being the way out? You had to trust Freeman though. He’d gotten you this far, and hopefully, the person he sent would be a guide through a whole new level.
crackle Are you ready, Wanderer? The Car Park awaits! crackle
With the crackling transmission fading out, you prepared yourself for what was to come. The vast, echoing expanse of the Lobby Levels stretched before you, illuminated only by the harsh, flickering lights that cast long shadows across the endless yellow walls. You took a deep breath, knowing that this would be the final stretch of your journey through this level of the endless Backrooms.
Chapter Eight: The Last Stop on the Left
Required: The Conductor (1 Max), The Ancient Conductor (1 Max), Monitor (3 Exactly), Crimson Knight (1 Max), At least 1 of each Hallway type (Destroyed, Bright, Dark, Poisoned), Car Park Portal (1 Max), any Permanent Fixture (Void, Space Portal, Greener Pastures), Skip Rock (1 Min)
Set-up: Keep the Conductor, the Ancient Conductor, and the Car Park Portal to the side at the start of the game.
Goal: It’s time to summon the Conductor, and clear the pathway to the Car Park! You must defeat 3 Monitors before the Conductor can be shuffled into the Pull Pile. Once the Conductor is defeated, you will then shuffle the Ancient Conductor into the Pull Pile for the final battle! After the Ancient Conductor goes down, you’ll then shuffle the Car Park Portal into the Pull Pile. Finally, you will need to find the Skip Rock and use it to enter the Car Park Portal.
Special Rules:
Once all 3 Monitors have been defeated, shuffle the Conductor into the Pull Pile.
When the Conductor is defeated, place him off to the side out of play and shuffle the Ancient Conductor into the Pull Pile, then find and defeat him.
Once the Ancient Conductor is defeated, search the Pull Pile and your DiH for the Permanent Fixture card, and set it aside out of play. Then shuffle the Car Park Portal into the Pull Pile.
Challenges:
Wave of Hypnosis (Lv 3): Engage and defeat 3 Monitors. NOTE: Once all three have been defeated, you may shuffle the Conductor into the Pull Pile.
Wandering Warrior (Lv 4): Engage and defeat a Green light or higher entity in each hallway type (i.e. Poisoned, Dark, Bright, Destroyed). For each unique Hallway type you defeat an entity in, gain 1 Point.
Horrors upon Ancient Horrors (Lv 4): Defeat both the Ancient Conductor and the Conductor with Crimson Knight as your Companion. NOTE: When the Conductor is defeated, place him off to the side out of play and shuffle the Ancient Conductor into the Pull Pile, then find and defeat him. Once the Ancient Conductor is defeated, search the Pull Pile and your DiH for the Permanent Fixture card, and set it aside out of play. Then shuffle the Car Park Portal into the Pull Pile.
Car Park Bypass (Lv 3): Acquire and use Skip Rock to enter the Car Park Portal.
[Spoilers] After defeating the Ancient Conductor: [Spoilers]
The battle with the Ancient Conductor was fierce and relentless. His terrifying form roared with power, every strike reverberating through the very fabric of the Backrooms. You fought alongside Crimson, dodging and attacking with everything you had. The energy of the confrontation surged like a storm, building to a crescendo.
At last, with a final, mighty blow from Crimson’s ax, the Conductor’s ancient form fell to the ground in a dark mound. The energy released was cataclysmic, sending shockwaves through the entirety of the Lobby Levels. The entire space trembled, and a blinding light erupted from the epicenter of the battle. You both stopped then, taking in frantic breaths you hadn’t had time for during the confrontation. With the Ancient Conductor down, surely you hoped Freeman’s theory would prove correct.
[Spoilers] Once you enter the Car Park Portal: [Spoilers]
You’d watched as the Backrooms seemed to shiver with the energy released by the battle with the Ancient Conductor. All the lights flickered wildly as you continued navigating. As you journeyed alongside Crimson, the Car Park Portal was now visible, a gateway to your potential escape. The force of the Conductor’s defeat had indeed created a rift, revealing the way forward.
You looked around, catching your breath. Freeman had mentioned someone would meet you at the Portal, and as you approached, a figure stepped out of the shadows. Could this be the guide Freeman had mentioned? A smile lit up your face as you realized it was Aiden!
“Hey, you made it!” Aiden, looking as cheerful as ever, waved at you reassuringly. “Freeman told me you might be able to make this happen, though I admit I wondered if he was right. The Car Park awaits! Hopefully, Freeman was right that it’ll lead you closer to home. Either way, let’s go, Wanderer! Follow me!”
“C’mon Crimson, let’s go!” You turn back but Crimson waves you off.
“I’m needed here, Wanderer, but you did well. Follow Aiden, he’s an old Car Park veteran.” You felt a little sad at the parting, but it was what it was. You shook his hand, then took one final glance at the Lobby Levels you’d been through again and again.
With a final glance, you turned back and stepped through the Portal, feeling a surge of hope and anticipation. As you entered the Car Park, the unfamiliar yet oddly comforting surroundings offered a glimmer of what might lie ahead.
Freeman's voice crackled one last time through the tiny radio watch, echoing in your mind: "Good luck, Wanderer. Follow Aiden! If my theories are right, the path home inches ever closer within reach."
The Car Park was no longer just a distant dream. It was your next step toward freedom.
Epilogue
Wow, what a journey we’ve had over these last eight weeks, Wanderers! Thanks so much for participating in our Weekly Challenge Season Three! I hope you all enjoyed these escalating challenges, and hope to see you back for Season Four when we venture into the Car Park levels! We will be taking a break for a little while to let everyone get their Car Park cards, and then we will announce when the new season starts! Thanks so much for being a part of this, and let’s see what the Car park levels holds in the near future! See you all in (probably) December!
Keep on Running, Wanderers! Take care